Debugging your code in App Inventor

Learn tips for debugging your code and fixing errors in MIT App Inventor

These are the activities for this lesson:

WHAT IS DEBUGGING?

Debugging is the process coders use to figure out why their code isn’t working, and then fix it so it does work. 

The term debugging came from Admiral Grace Hopper, a pioneer in computing. She was working on the Mark II computer at Harvard University in the 1940s and a moth got stuck in the computer and stopped it from working.

Getting rid of the moth, she said they were “debugging” the system. Programmers use the term now to mean “fixing errors in my code”.

Grace Hopper

CODING TIPS

dog looking at computer

Debugging can often be the most frustrating and time-consuming part of coding, so it’s really important to leave plenty of time for it!

And also to be patient!

SMALL CHUNKS

Sometimes programmers are tempted to code their entire app in one go, then test it.

Don’t fall for that temptation!!!

If something doesn’t work correctly, which is likely, it’s hard to figure out where to even start to try to fix the error. 

chunks of chocolate

Break the coding for your app into small chunks. 

Get one thing working before starting on the next thing. 

Code a little bit, test a little bit, confirm it works, then code a little more, test a little more, etc. 

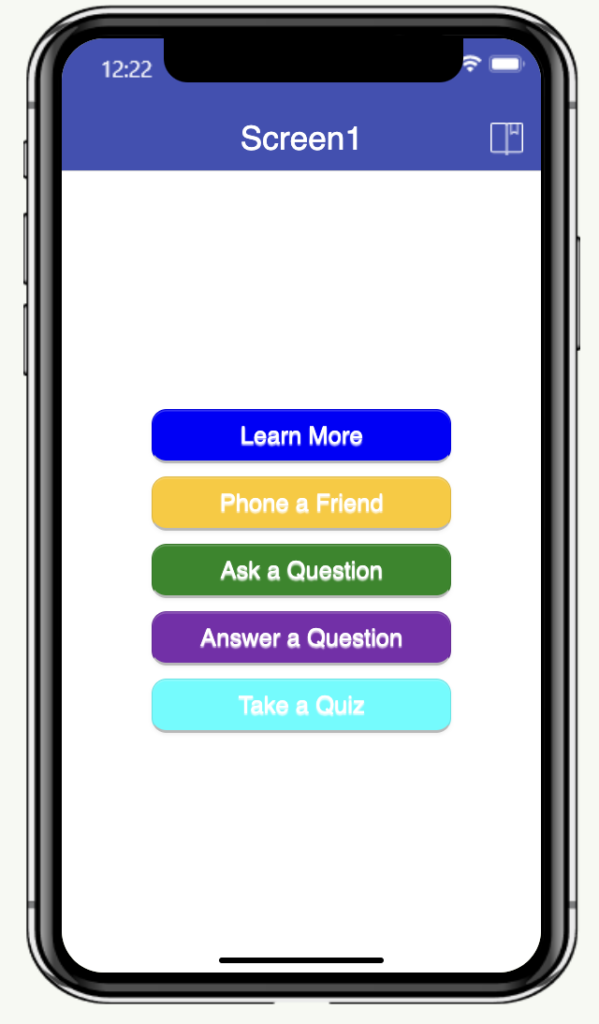
For example, if your app has 5 buttons that all do different things,

  1. Code the action for the first button
  2. Then test to make sure it works.
  3. Move onto the second button
  4. Repeat.

It’s better to fix code in one place than go back and fix it in 5 places if there is an error in your code.

app with 5 buttons

VERSION CONTROL

it began as a mistake

Let’s say you follow the “small chunks” rule and have one part of your app built and working.

You add some new code and suddenly everything stops working. 

OH NO!

You try to delete the new code but your app still isn’t working. You aren’t sure what went wrong and wish you had an “undo” button.

To avoid scenarios like this you can save versions of your app as you get parts working. 

That way if you make a mistake and don’t know how to fix it, you can go back to the last working version you saved.

You can also use version control to experiment with new features without worrying about breaking your working app.

There are two ways to save different versions in App Inventor, using “save as” and “checkpoint”.

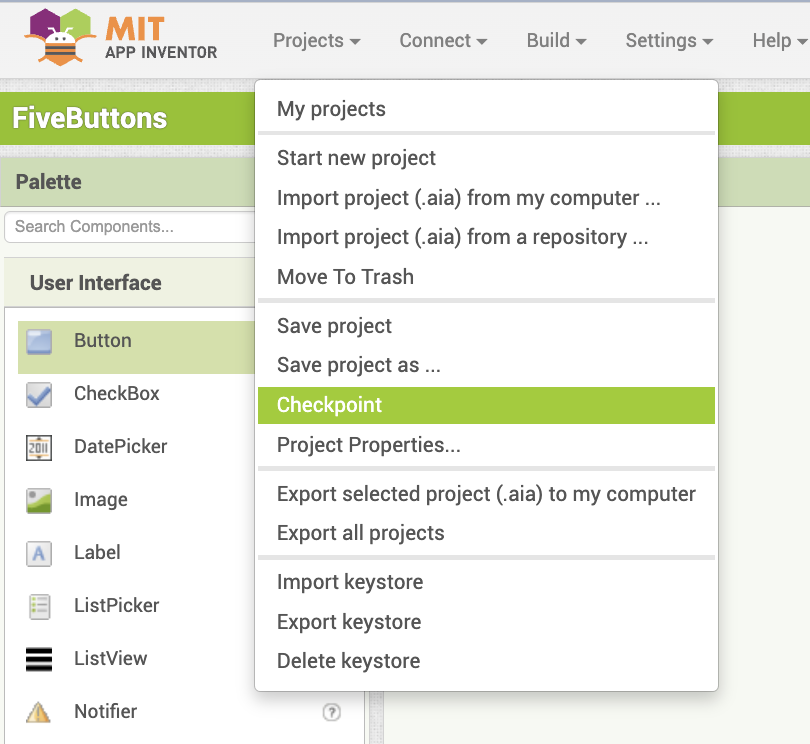
The “Checkpoint” option will save a copy with whatever name you give it, but you continue working in the original. The idea is to “checkpoint” that version that works and continue your development in the main version of the project.

Project menu, checkpoint selected

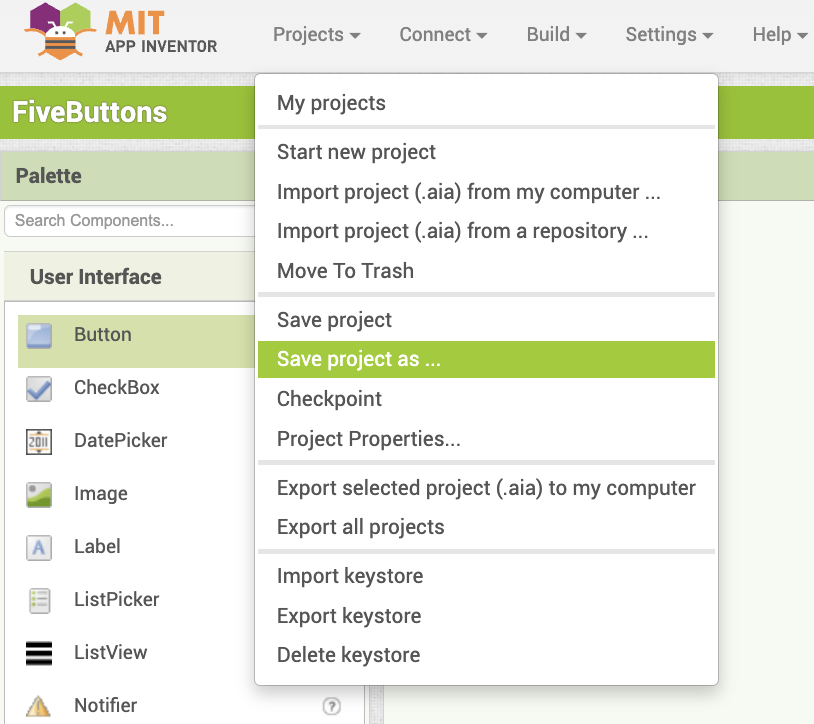
The “Save project as” option will create a copy of the code you are working on and save it under a new name. Any edits you make will be in the new copy.

project menu, save as selected

COLLAPSE BLOCKS

Collapsing blocks is a way to keep your code organized, as your code workspace starts to get crowded with blocks.

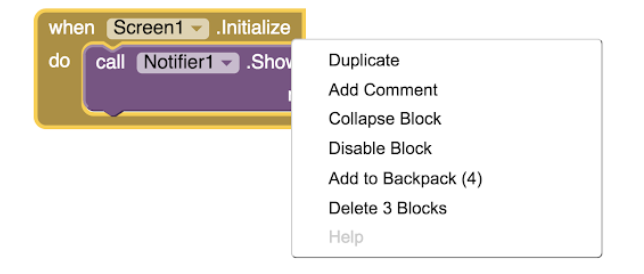
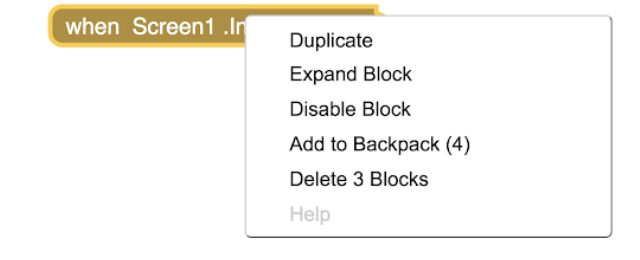
If you right-click on a block, you’ll see an option to collapse it.

To expand your blocks again, right-click on them and select Expand Block.

app inventor expanding a block

Collapsed blocks will compress it down to one bar on your screen.

They still work the same as regular blocks, they just take up less space. This can be helpful if you have blocks you no longer need to edit and want to clean up your screen

collapsed block

DISABLE BLOCKS

You can also disable blocks.

They remain on your screen but don’t run in the app.

With disabled blocks, you can test your app without certain code blocks. You can enable them later and they will run.

You can also disable blocks that you have used for testing only, like Notifiers.

There are two ways to disable blocks in App Inventor

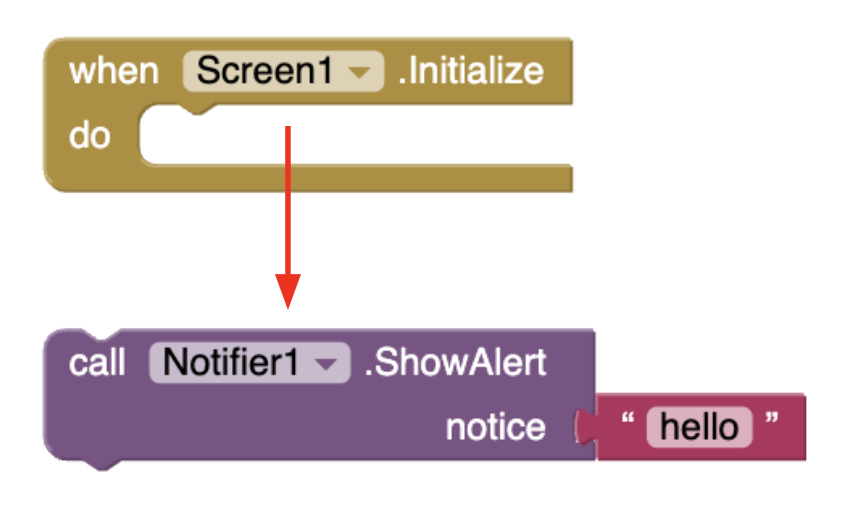
Simply dragging blocks out of an event handler block will disable them and prevent them from running. Because they are not part of any event, there is no way they will ever execute. You can always snap them back in to use them.

disabled block by dragging out of event block

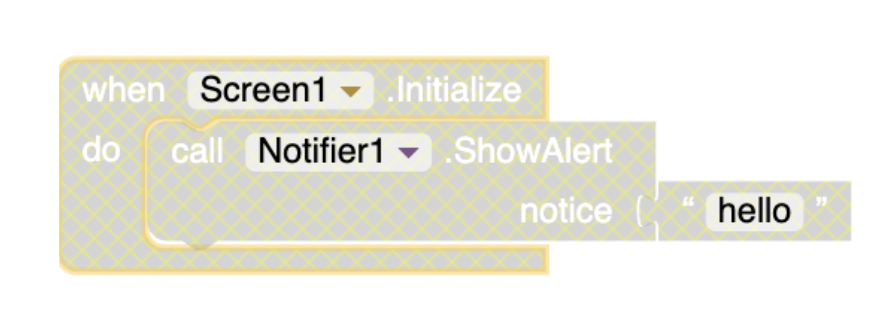
You can also right-click on a block or group of blocks and choose “Disable Block“. The blocks will appear greyed out to show they will not execute. This way you can disable an entire set of blocks.

To enable your blocks again, simply right-click and choose “Enable Block”.

COMMENTS

Programmers often leave comments in their code to explain what it does. 

Comments can be helpful when other people are looking at your code, such as teammates, mentors, and judges.

Comments can also help if you return to your code later and have forgotten what parts of it do.

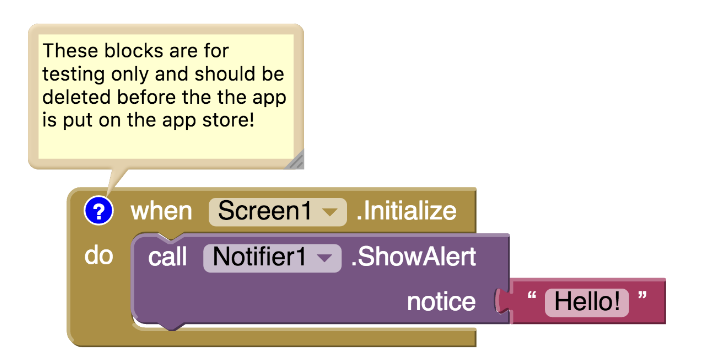
To add a comment, right-click on the blocks and select “Add Comment”.

After that, a question mark will appear in the corner of the block and you can add text. You can view the comment by clicking on the question mark.

Best practices: Comments are the most helpful thing in programming.

There have been many times when a coder has coded something and then gone to sleep and come back the next morning and have no clue about what they were doing the night before. Always write comments!

It’s also a great way to check your knowledge, because if your coding blocks are easy to comment on then you must understand them really well! Another thing to be aware of is that <, >, =, ≤, ≥ are hard for students for the first time (and for programmers who are years into their careers). When we set a math statement to < when it should be ≤ this is called an “off by one” error and this is a problem that happens to developers with 20 years of experience 😛 It is a very popular problem so be on the lookout for that. 

The best type of debugging is rubber duck debugging! This is where you are really stuck in your code and it makes no sense. You want to take some time to talk through it with someone else to see if they can spot the problem but unfortunately no one is around! So you have a trusty rubber duck at your desk and you explain the problem outloud to your duck friend. You have to do it in very simple terms for them to understand though and then after that you will find the problem yourself! All of my coworkers do have rubber ducks at our desks and do this quite often!

Guiding Questions to ask students: How long do you think it takes experienced coders to debug bugs? You would think they could get really fast at it but each big site has pages dedicated to seeing how long bugs are in existence (Facebook for example) and they will also show if any of their pages are down/broken and they are currently debugging (Facebook example).

How do you find bugs? (lots and lots of testing!) How much testing do you think you should do? How much testing should you get other people to do?

How do you know when you have found a bug? Sometimes you may spend forever clicking on an image only to realize that the button you’re supposed to be clicking is under the image. Is that a bug? It’s a design choice that the app maker made and they don’t think it is a bug but you might.

Mentor tips are provided by support from AmeriCorps.

stylized A, AmeriCorps logo in navy

DEBUGGING TIPS

NOTIFIERS AND LABELS

The Notifier component can help you figure out why your code is broken. 

To put a Notifier in your App Inventor app drag it over from the user interface palette.

ShowAlert example

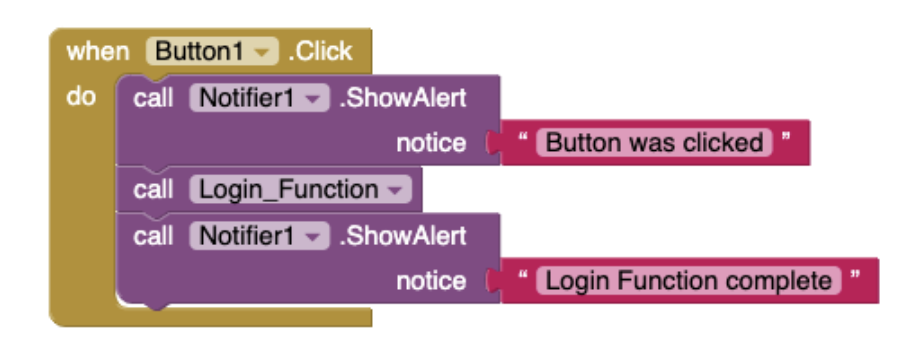
The easiest way to use the Notifier is to add ShowAlert blocks with information for you to see that certain blocks have run (or not).

In addition to messages, you can display information like the value of a variable or the position of an ImageSprite.

You can also add Labels to display current information in your app. 

For example, you might want to know the value of a variable as certain events happen while the app is running. 

You can set the Label.Text to whatever it is you want to know and it will display on your app. 

Once you’ve debugged your error, you can either make the Label invisible, or delete it altogether from your app.

DO IT

 The Do it feature is another great tool for debugging.

While you are live testing your app, either with a phone and the AI Companion app, or with the emulator, you have access to a new command, “Do It”.

The command is greyed out until you connect to a phone or the emulator through the Connect menu.

Do it lets you run a block without having to interact with the app itself, so you can see the current value of a variable or element. 


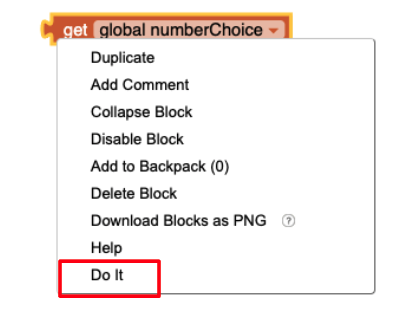
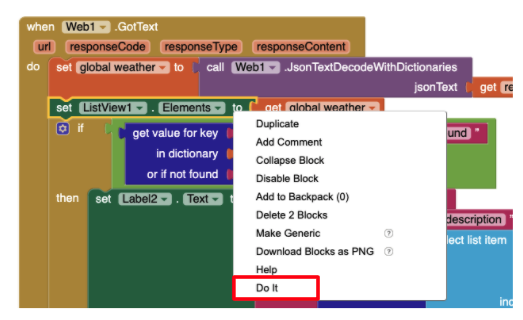
Just drag out a “get global” variable block and right-click. Select “Do It” from the dropdown menu and that block of code will execute.

Do it on pulldown menu

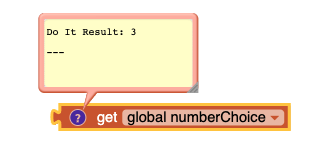
A yellow Do It box will appear above the box with the result. This can work for any component property too!

Do it block result

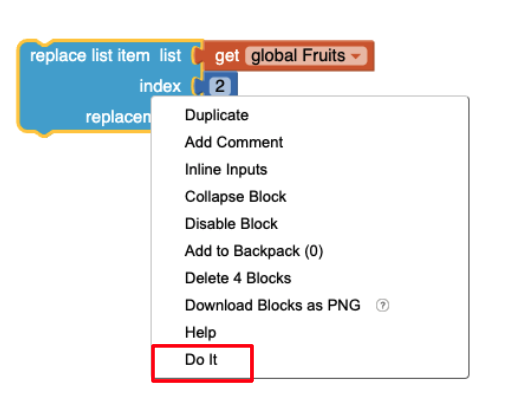
You can also use Do It to change something in your app. For example, you might want to change an item in a list. Drag out the block to do that, and select Do It. You won’t see the result, but the list will be updated within your app.


setting a list value with do it

You can also run an existing code block in your app. 

For example, here the ListView elements will be updated using Do It. That will be reflected in the app. The ListView will display the new elements set with the Do It command.

updating a listview with do it

USE TEST DATA

If you have a lot of information to use in your app, it can be helpful to use test data. Test data is a simpler, smaller set of data that you can use to make sure your app is working correctly.

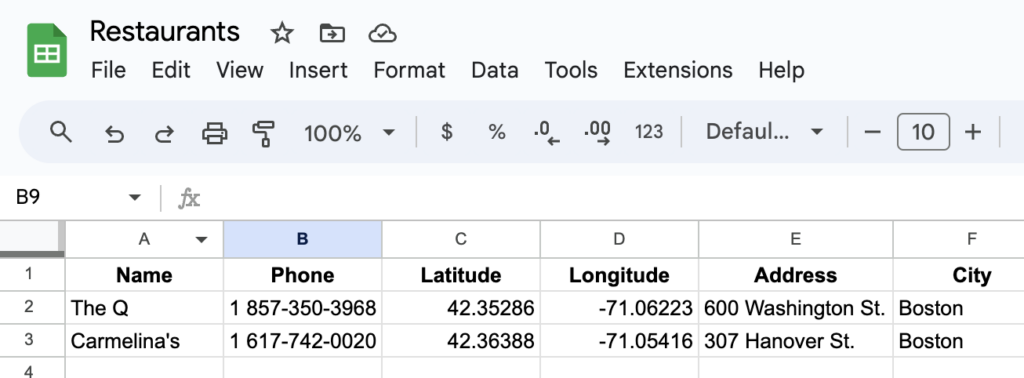
Let’s say you are making an app that displays nearby restaurants. You are using Google Sheets to store the restaurant information.

You can start with just one or two test restaurants and test your app to make sure it works.

Once it’s tested and working, you can add the complete set of restaurant data to your Google sheet.

CHANGE PROPERTIES

If you are live testing your app, you can change a property value in the Designer while you run the app and see its effects.

Sometimes this can help  uncover an issue.

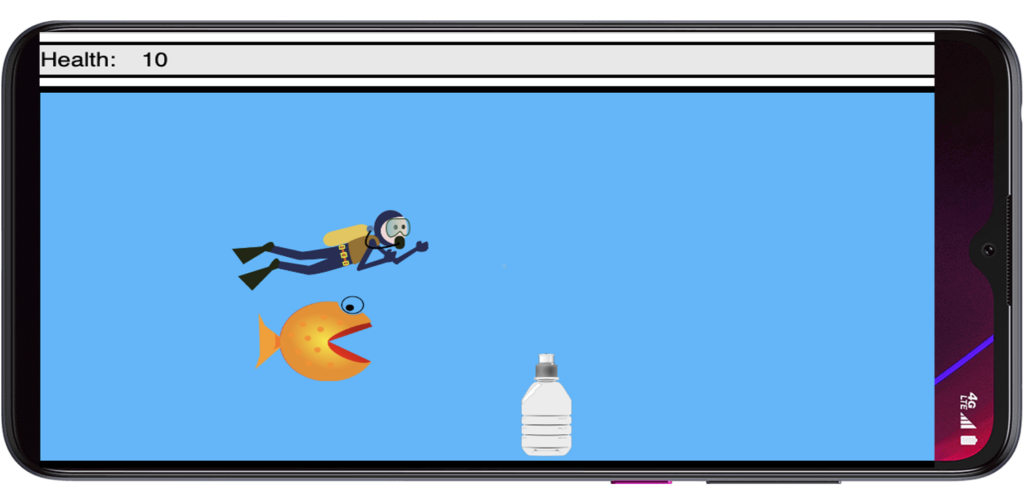
For example, you might be coding a game. A sprite’s position doesn’t look right to you on your phone when it’s running.

While live testing, you can

  1. Go to the Designer
  2. change the X and Y values of the Sprite
  3. The position of the Sprite on the screen in the running app will change. 

Use this to test and understand coordinates on your screen.

game with sprites

ACTIVITY 1: FIX THE BUG

Estimated time: 20 minutes

Fix bugs in the Timer App

This Timer App has a couple of bugs in it.

  1. Load the app into App Inventor.
  2. Connect to the emulator or device to test the app.
  3. Try pressing Start without typing anything into the textbox. What happens?
  4. Try entering 0 or a negative number for number of seconds. What happens?
  5. Fix the bugs using conditional blocks!

ACTIVITY 2: ADD A COMMENT

Estimated time: 10 minutes

Add a comment to your App Inventor project

If you have started your final app for Technovation, use that app for this activity. Otherwise, use the Timer App from Activity 1.

Add at least one comment to your app explaining what a group of blocks does. Pick a group of blocks that you think it is the hardest to understand because those blocks would probably be the hardest for someone else, like a team member, to understand.

REFLECTION

These tips can help you as you start to code your mobile app for your Technovation project.

But remember…

Photo courtesy DKJS Franziska Schmitt
Coding is not easy.
Chances are good that your app won’t work perfectly to start!
Code in small chunks.
Celebrate when you get a small part of your app to work.
Take breaks! Sometimes just walking away from your computer for a few minutes can give you the fresh perspective you need.
Previous slide
Next slide

REVIEW OF KEY TERMS

  • Debugging – the process coders use to figure out why their code isn’t working and fix it
  • Version Control saving working versions of your app as you make progress
  • Test data – a simpler set of data that you can use to make sure your app is working correctly
  • Comments text that is included in code to explain what it does

ADDITIONAL RESOURCES