several girls working in a classroom

App Examples using Thunkable

  • Experiment with app examples that align with your solution idea

These are the activities for this lesson:

DIVE DEEPER

You are at a point now that you want to start coding your app.

Maybe you already have started!

Or perhaps you’re not quite sure how to combine the components you think you need to make your app work.

We’ve come up with a list of app types or categories that many Technovation projects fall into. The tutorials are examples for you to follow and learn from. They won’t show you exactly how to build your app (that’s no fun!) but they will hopefully give you an idea of how to use particular Thunkable features. It’s then up to you to transfer that knowledge into your project.

It’s not easy, but that’s what learning is all about!

scuba diver looking down

WHERE TO FIND HELP

Search Online

Google (or alternate search engine) "Thunkable" and whatever feature you want. For example, you might Google "Thunkable quiz" if you wanted to make an app that quizzed users on a topic.

Thunkable beaver logo

Thunkable website

Lots of great resources provided by Thunkable. Start with Thunkable docs but check out the rest of the website for great resources.
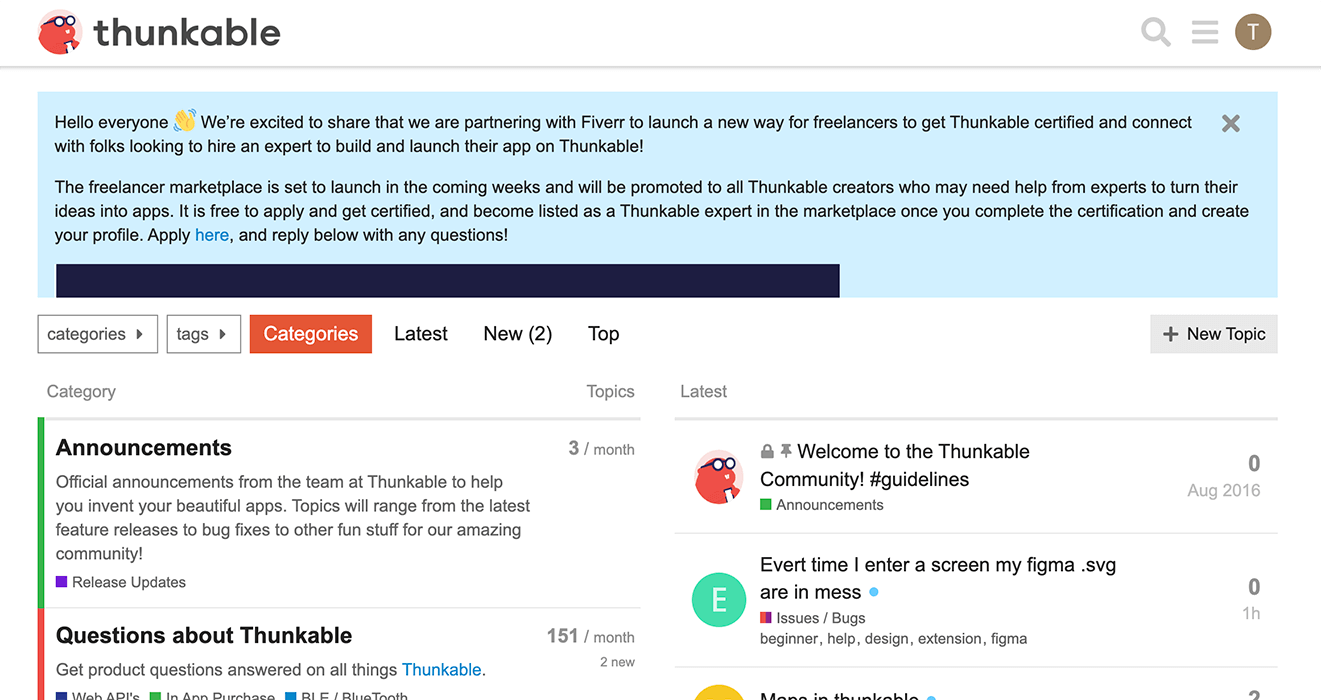
Forum Help

Community forum for Thunkable users is a friendly place to post a question and get some expert help!

Youtube

Thunkable has their own channel with lots of great tutorials.

ChatGPT

ChatGPT is great at helping with coding questions, even block-based coding platforms like Thunkable. You won't get visual blocks but very good text-based answers

Sign up for a Technovation coach

Technovation Coaches

Did you know you can get personal help from a Technovation coach? Your team can sign up for a one hour session to ask questions and get help with your app.

ACTIVITY: COMPLETE A TUTORIAL

Estimated time: 60 minutes

Follow a tutorial that aligns with your project

  1. Choose one example app below that has some of the features of your solution app.
  2. Complete the tutorial, bearing in mind that the app may not be exactly like your app.
  3. Use the experience to learn more about the components and how they can be used within an app.

Click on an app to access the corresponding tutorial.

Login App
location app screen
Location App
green tracking app
Tracking App
Info App

Login App

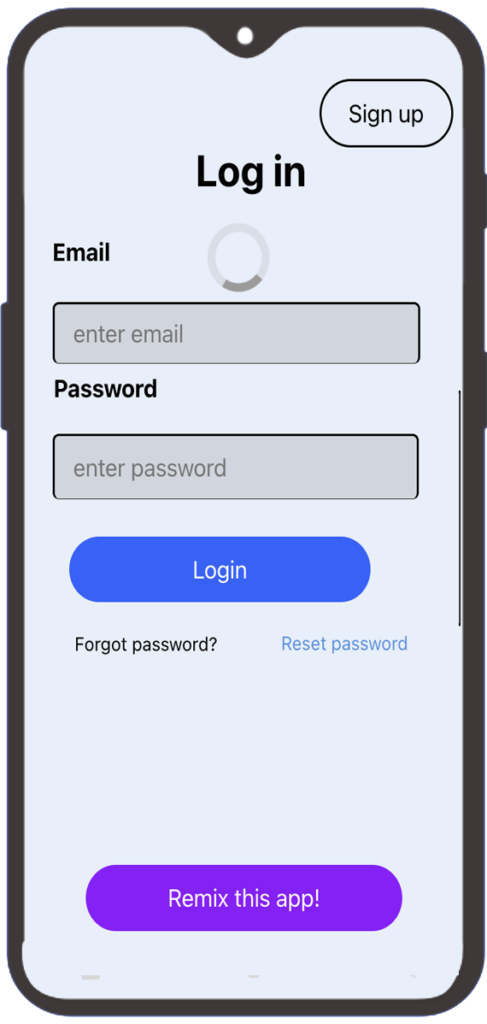
This tutorial shows you one way to add signup/login capability to your app using Firebase, Cloudinary, and Google Sheets. Dave Wolber provides a great starter template (log into Thunkable first) for you. You can then add the critical features to your app that actually solve your problem.

Location App

This app is a good example of using the Map component to provide location-based information to users. In this case, volunteer opportunities. The app also uses Web Viewer to display website information, and a Share component so the user can call volunteer organizations from the app.

Part 1 – add Map, Markers, and basic information

Part 2 – add second screen to display website and make phone calls

Tracking App

This app is an example of storing a user’s personal information on their phone using stored variables so they can track something – in this case, how green they are acting.

Optional: 

Part 2 Add consecutive day tracking 

Part 3 (advanced) – Test by adding a Test button to set variable values behind the scenes.

Information App

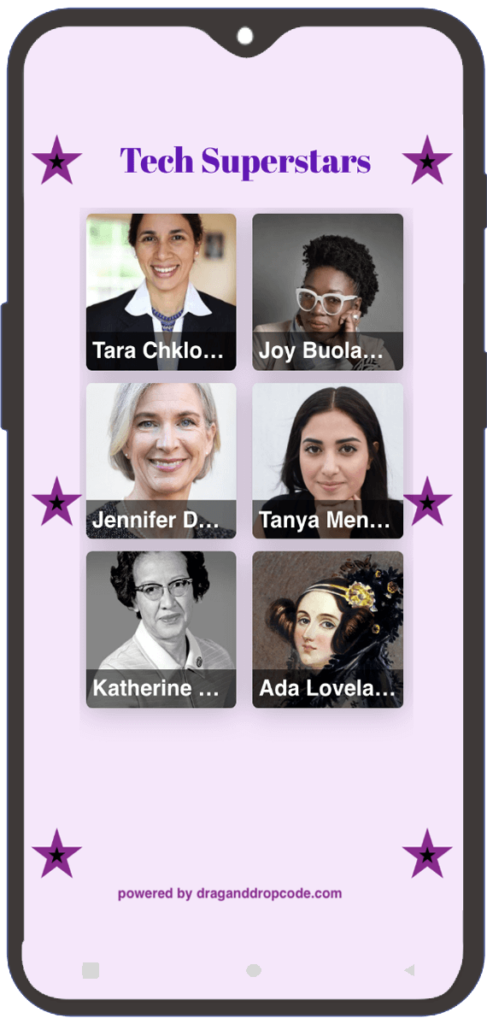
This tutorial shows you how to share information from Google Sheets with all users of the app, in this case, Tech Superstars.  There is a full playlist for this tutorial, so keep going to learn how to add an input screen so users can add their own information to the app and have it display to all users.

REFLECTION

The example apps in this lesson provide some features that you may have decided to include in your mobile app. Chances are they are not exactly like your app.

Consider these questions:

Italian bridge reflection
How is the example app similar to your solution?
What is different?
What have you learned in this lesson that you can apply when coding your own app?
Previous slide
Next slide
girls coding around laptop

Variables and Lists in Thunkable

  • Learn how to use variables to store data within an app
  • Learn how to organize data into lists
  • Use variables and lists in an app

These are the activities for this lesson:

STORING DATA

When you code an app, there usually is some information or data that you need to store, update, and access in the app.

There are 3 types of data you might need for running an app:

Variables

Store information while the app runs.

For example, a username or a game score.

Local Storage

Store information on the mobile device to be retrieved each time the app runs.

For example, a user address or high game score.

Cloud Storage

Store information on the web (cloud) so all app users can access the information.

For example, game leaderboard or chat messages.

In this lesson, we’ll focus on storing data within the app, using variables.

VARIABLES

One of the most important concepts in coding is a variable. A variable is a name for a piece of data that can change. An easy way to remember is that a variable can vary, or change in value.

There’s lots of information that is important to you every day that changes value. Here are some examples:

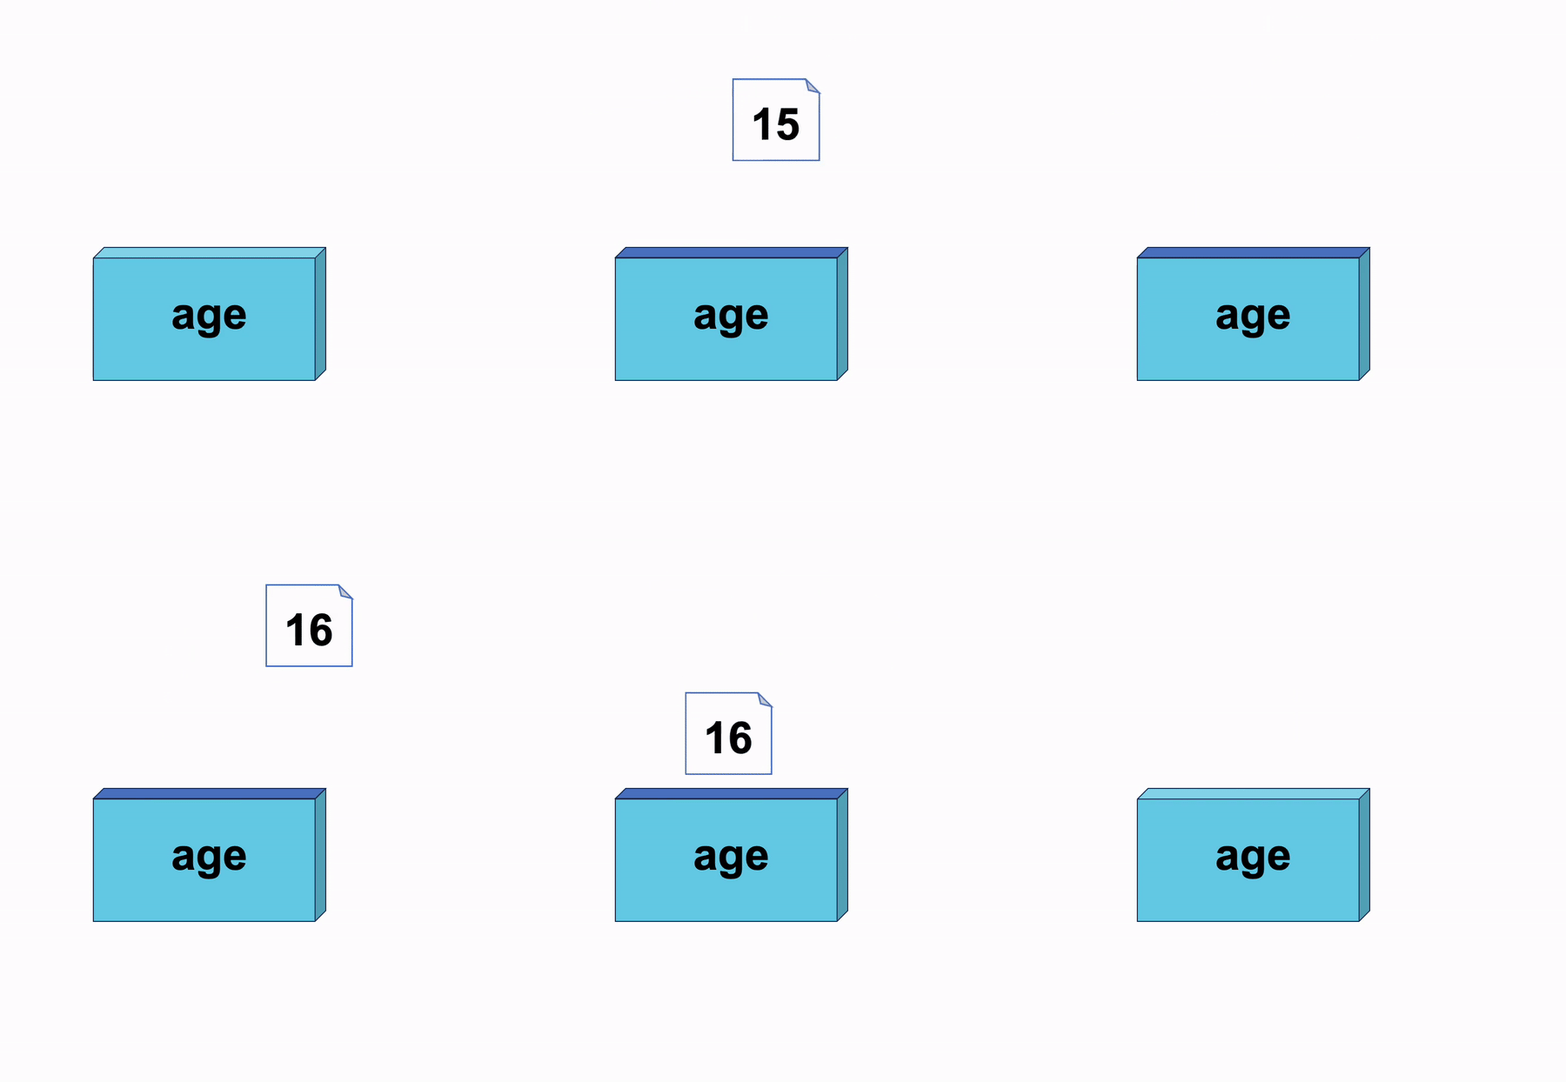
birthday cake with candles
your age
clouds with raindrops
the weather
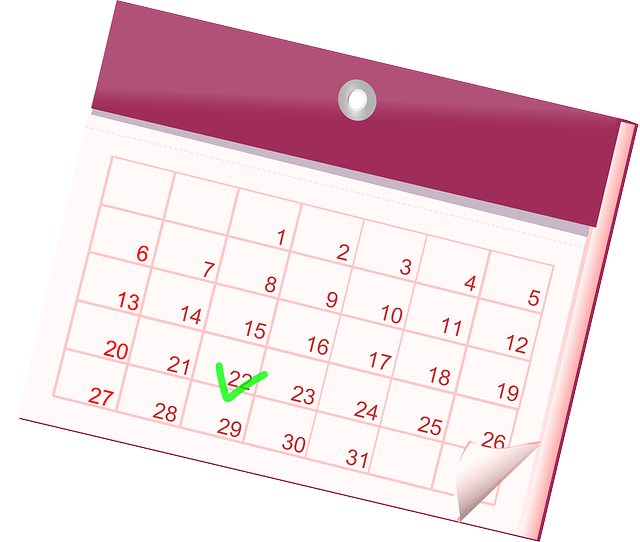
monthly calendar
today's date

A variable is like a box where you can store information inside. 

  1. You label or name the box to remember what is inside.
  2. When you need the information you can open the box and get what is inside
  3. You can also change what is inside the box but keep the same name outside.


animation of variable being stored in a box

THUNKABLE VARIABLES

In Thunkable, you use app variables to store information while the app runs.  

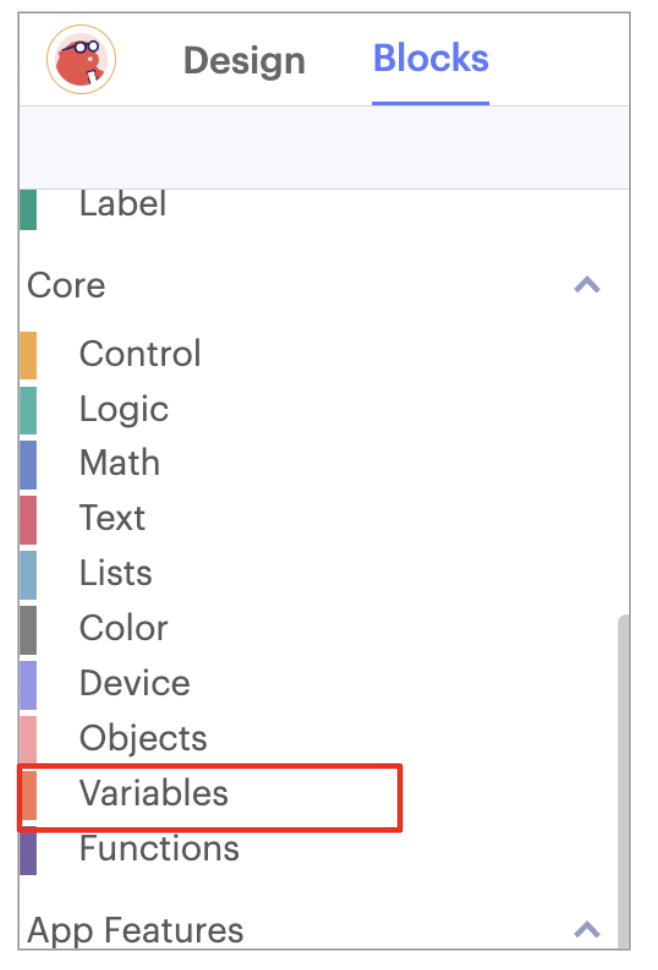
All variable blocks are found in the Variable drawer. 

thunkable variable drawer

There are three basic blocks for variables. Learn about them in the tabs below.


The initialize block sets aside storage in your app for your variable. Give it a useful name.

app variable numberOfLessons is initialized to 0

Here a variable numberOfLessons is initialized to 0, perhaps to track how many lessons have been completed in an education app.

The set block lets you set, or update, the value of the variable.

set variable block

Here, the current value is gotten and the variable is set to the current value + 1. So, if numberOfLessons was 2, the new value would be 3.

The get block lets you get the current value of the variable.

Here, the get block is used to insert the number of lessons into a sentence to display in Label1.
get block used in join block for setting label1 text
Here it is used to get the current number of lessons to test if it is zero, in a conditional block.
get block used in if block

LISTS

As you build your app, you might find you have multiple pieces of data that need to be accessed within the app.

For example, instead of one username, your app might need to access all the usernames for the app. Or perhaps your app is all about animals, so there are multiple animal names and images that must be stored.

In Thunkable, you use something called a list to organize mulitiple data items in your programs. Other programming languages call them arrays, but they are essentially the same thing.  

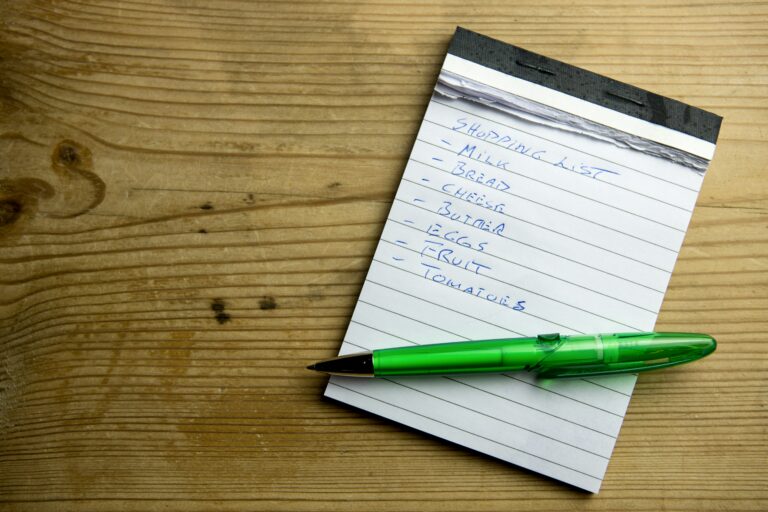
You may have made a to-do list or a grocery list before, and lists in programming are very similar.

shopping list on paper with pen on top
lists palette in thunkable

Lists are accessed through the Core blocks palette in the Blocks Editor. There are several blocks that allow you to create, store, retrieve and update items in a list.

You store a list in an app variable, so you can give your list a name.

initializing a list of fruits

You should use lists anytime you have multiple pieces of information that are related.

For example, if you wanted to display the top 10 high scores for a game, you could make ten variables with names like HighScore1, HighScore2, HighScore3 and so on until you get to HighScore10.

The preferred action is to make a list called HighScores to hold all 10 high scores. Ordering, updating, and adding high scores is much easier with a single list.

10 variables vs a single list

Each item in a list has an index, which is its place in the list, to allow you to retrieve the item from the list.

For example, in the blocks below, the index of 2 points to the 2nd item in the Fruits list. So, Label1 will display “Bananas”.

initializing a list of fruits
from label1.text set text to in list (app fruits) get #2.

You can also add, remove, and replace things in lists. 

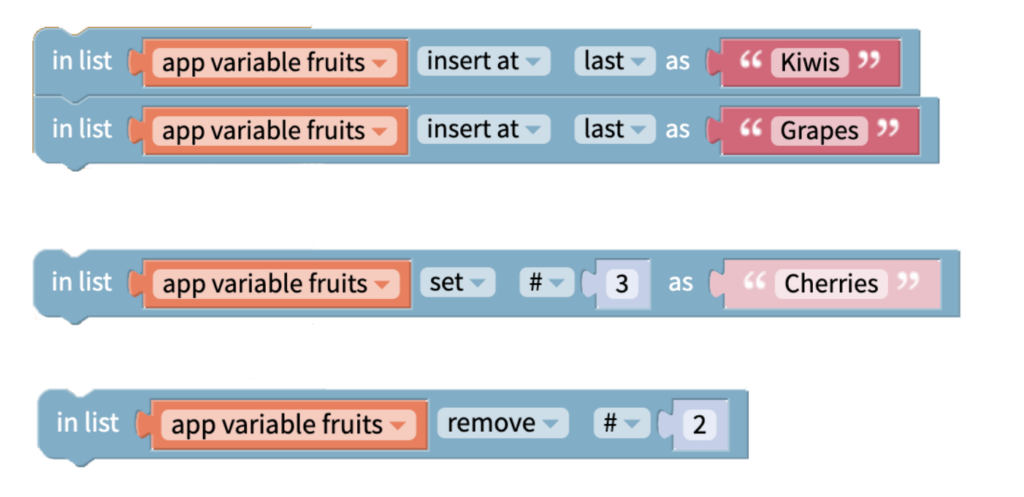
If you took your original Fruits list of [Apples, Bananas, Oranges] can you guess what the Fruits list will contain after you run the blocks below, in the order they are in?

initializing a list of fruits
Thunkable blocks to update fruit list

Best practices: The word variable is one of the harder topics for students to learn. The box analogy really helps so if you have to do some real life labeling of boxes to illustrate things, that might be a good idea!

Guiding Questions to ask students:

Do you think there are other ways to store data other than lists or variables? What about if you want to keep two values together? Like I want a list of how many oranges and how many apples I have, something like so:
Oranges: 3
Apples: 5

I want to store this somehow. It’s a more complicated list. It’s almost like a list where the values are linked together like so:
Oranges -> 3
Apples -> 5

The arrows have a direction kind of so we would call this a map! There are plenty of other data structures too! Can you find any others?

Advanced knowledge for students who are excelling: If one of your students is interested in doing more coding that isn’t block coding (ex: continuing to code in Python or Javascript) you could explain to them that coding languages care more about what is in the box. For example, numbers are handled differently than characters in a word. Languages like Python and Javascript are very picky about how you store numbers vs characters because they are different “types” of things you can store in your variable. You could make the analogy that you use different types of boxes to store things: Your leftovers have to go in a special box for leftovers (tupperware) and then when you are moving, your stuff has to go in a moving box (cardboard box). The same is for python. Numbers go into numbers boxes and characters go into characters boxes. 

Mentor tips are provided by support from AmeriCorps.

stylized A, AmeriCorps logo in navy
solution: list [apples, cherries, kiwis, grapes]

ACTIVITY: COMPLETE THE QUIZ APP

Estimated time: 45 minutes

Complete the code using variables and lists

Follow the directions in the worksheet to make a quiz app that tests the user's knowledge on a topic of your choice.
Open Worksheet

REFLECTION


In this lesson, you learned how to store information in your app, and how to use lots of information with lists. Consider these questions:
reflection with bits of data
What data will you need to store in your app?
How might you include lists in your app?
Previous slide
Next slide

REVIEW OF KEY TERMS

  • Variable– a way to name and access information within an app
  • Lists – a way to organize multiple pieces of data in Thunkable
  • Index  –  a number that tells you where a piece of data is in a list 
  • Array – common name for lists in programming languages other than App Inventor and Thunkable

ADDITIONAL RESOURCES

The Simple List component (formerly called List Viewer) allows
  • display of list elements in your app
  • user selection of an item in the list.
  • coding of an action to take when the user selects an item

Watch this video for a quick demo of it in use:

Exploring Mobile App Builders

  • Learn about different app builders and programming languages
  • Get set up to use an app builder to build a mobile app

BUILDING A MOBILE APP

For your Technovation project, you will be building an app that can run on a mobile device. Web apps are an option, but suggested for participants who have some previous coding experience and who are looking for a challenge.

Here we’ll start to explore building a mobile app using block-based coding. If you are new to coding, this is the place to start!

To make a mobile app, you will use an App Builder. App Builders are also called coding platforms. 

Coding platforms are software that either run on your computer, like Android Studio, or online websites like MIT App Inventor. They allow you to write code, whether using blocks, like App Inventor, or text, like Android Studio. Your code gets compiled, or turned into machine code, something that computers (and mobile phones) understand. Once converted to machine code, the computer or phone can run the code to follow your instructions.

APP BUILDERS

App Builders usually have a drag and drop interface that allows you to build apps by using blocks instead of typing code. Even though the code looks simple in app builders, you will still be learning valuable coding concepts.

If you are new to coding, we recommend you use either App Inventor or Thunkable for your programming language. You are not limited to using these platforms for your project, but these are the ones we will support in this curriculum.

App Inventor bee logo
MIT App Inventor
Thunkable beaver logo
Thunkable

To choose between App Inventor and Thunkable, you should base your decision on which platform has better support for the features you want to include in your app. Check out the following table to help decide.

Feature App Inventor Thunkable
Can run and test project on both iOS and Android Yes Yes
Open Source* Yes No
Free Yes Free with limits, maximum 10 apps, all are public
Available in many languages other than English Yes No
Gallery with example projects With phone over wifi, or with emulator Built-in preview in browser (easier to test with), or with phone
Live Testing Yes Yes
Build app to install on phone or upload to App/Play Store Android only Limited to 2 downloads per month
User Interface Basic More options and control
Maps More options and control Basic
Sprites and animations for games Easier to use Works but is more complicated
Storing data on mobile device TinyDB (tag/value pairs) Stored variables
Storing & sharing data in the cloud CloudDB, Firebase, Google Sheets Airtable, Firebase, Google Sheets, Media DB (many more options, easier to implement)
Artificial Intelligence Personal Image Classifier, Personal Audio Classifier, Face Mesh, Posenet (many more options) Image Recognizer (pre-built Microsoft image classifer)
Generative AI ChatGPT, Dall-E ChatGPT, Dall-E
Data Science/Charts Built-in chart component, regression models Use external API

* What is Open Source?

Open source means that all the code used to create the app builder is free and open to use on the web. This may be important to you if you are concerned about losing your work if an app builder stops being supported or goes out of business. It may also be important to you if you want to find a work around to use an app builder offline.

OTHER LANGUAGE OPTIONS

There many other programming languages that you can use to build apps besides App Inventor and Thunkable, mostly text-based. 

Below are four top languages other than App Inventor or Thunkable that Technovation participants used last season. You are not limited to these languages and can use any programming language you are comfortable with. You will need to provide the source code files with your submission.

Programming Language Create apps for Coding Platform Starting Resources
Java Android Android Studio
Swift iOS XCode
Dart (Flutter SDK) Android/iOS Android Studio
Streamlt (Python) Web apps (any browser) Anaconda (Windows) or any text editor/IDE

Not sure which coding platform/language to use?  Listen to these Technovation alumnae talk about what coding platform they chose and why.

Best practices: Check out the Technovation YouTube Coding Playlist and watch a couple with your team to help understand how each one works and to make your decision. 

Advice from past participants: 

  • Thunkable has a clean interface, innate compatibility with iOS, and availability of features that other app builders might not have
  • App Inventor is reliable and many participants have some familiarity with the tool
  • Swift and Java can be great for returning students who want to challenge themselves or explore different features
  • Other programming languages are great too.

Mentor tips are provided by support from AmeriCorps.

stylized A, AmeriCorps logo in navy

GETTING STARTED

To code mobile apps for your Technovation project, you will need:

  • a computer or laptop
  • Internet access
  • Mobile device is optional but highly recommended for testing. Both Android and iOS devices can be used.
To get started, you’ll have to set up your computer and mobile device so you are ready to code a mobile app!
 

ACTIVITY 1: SETTING UP YOUR CODING PLATFORM

Estimated Time: 30 minutes

If you are using something other than Thunkable or App Inventor, use this time to download all necessary software to get your computer set up by following the resource links above and following setup instructions.

For Thunkable and App Inventor coders, click on the appropriate tab below and follow the instructions to get your workstation set up to begin coding! Feel free to try both platforms to see how you like each one.

Part 1: Signup
  1. In your browser, visit http://ai2.appinventor.mit.edu. Sign up with a Gmail account. If you don’t have a Gmail account, make one now.
  2. Once you have logged in and see the splash screen, click Continue.
  3. Click on Start a Blank Project to open a new project.
  4. Take a moment to look around the platform.
Part 2: Setup to Test
You will need to test your app as you build it to make sure it works correctly. There are multiple options found here

Part 1: Sign Up

In your browser, visit the Thunkable Signup page to sign up for a free account. 

Part 2: Setup to test

You can test your app in Thunkable right in the browser using Web Preview. At some point you will want to live test your app on your mobile device. You will need to install the Thunkable Live App on your device.  

ACTIVITY 2: CODING YOUR FIRST APP

Estimated Time: 30 minutes

Now that you’ve got your computer and mobile device set up for your app builder, let’s jump right in with a starter tutorial!

Click on the tab below for your chosen coding platform and follow the instructions. 

Instructions:

Make theTalk to Me app. Click here to follow a written tutorial in the App Inventor platform.

If you prefer video, follow along with this tutorial:

Instructions:

Make theTalk to Me app by following this video tutorial by Dave Wolber.

WANT MORE?

If you have time, try another tutorial on your chosen coding platform:

REVIEW OF KEY TERMS

  • App Builder –  program that usually has a drag and drop interface that lets you build apps without typing code 
  • Programming Language – a way to talk to a computer, or mobile phone, to tell it to do things
  • Coding platform – program or website that allows you to write programs or apps
  • Compile – convert computer code into machine code that can be understood by a computer

REFLECTION

Congratulations on making your first app! Here are some reflection questions for you to consider with your team and with your mentor.

Sunset and reflection over lake
What are some things from this lesson that you think will be useful in creating your app? Why do you think so?
How do you think the block language is different from the language you are used to using in everyday life?
Previous slide
Next slide
girls working at computer

Thunkable: Closer Look

  • Learn about event-driven programming
  • Understand the different types of blocks in the Thunkable platform

These are the activities for this lesson:

EVENTS

Mobile apps are based on event-driven programming. 

Event driven programming is based on events, rather than running code from top to bottom. Some programs just execute all their code at once, but mobile apps work based on how the user interacts with it.

Mobile apps work based on events, which are things that happen to trigger code to run. An example would be – the user clicks on a button. The event is when the user clicks. And the code to run when that event happens is called the event handler.

STOP AND DISCUSS

Can you think of some ways you interact with your phone and what your phone does? Here are a few to get started:

  • When you click an icon for an app, the app opens.
  • When you click “send” for a text message, it sends the message and makes a sound.
  • When you try to log into an app, the app asks for a password.
girls discussing

Let’s start by looking at the different parts of the Thunkable platform.

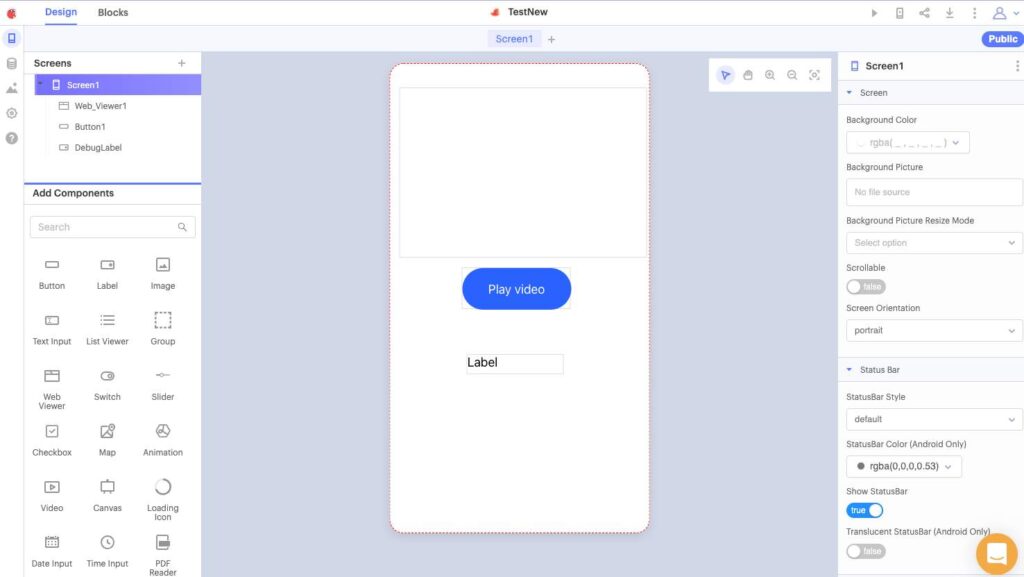
Thunkable has two windows you use to build your app. Clicking on Design in the top menu bar (top left of screen) takes you to the Designer, where you design the user interface. The user interface is everything in your app that a user can interact with. These things can be buttons, navigation bars, text boxes, pictures, etc.

THUNKABLE DESIGNER WINDOW

Thunkable designer window
1

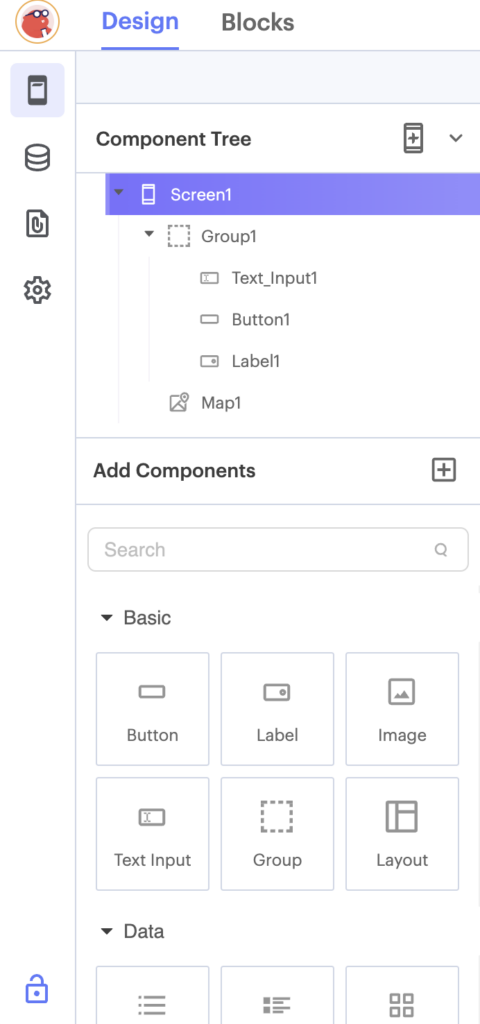
Component List

All components you have added to your app appear here, organized hierarchically by screen.

3

Workspace

You drag your components onto the phone in this central workspace. You have control over where the components are placed as well as their size.

2

Add Components

You drag visual components from this panel into the workspace. 

4

Properties Panel

The Properties panel allows you to set the properties for each component. Properties are different characteristics you can set for each component, like its width, height, and color. Select a component on the mockup and then you can change any of its properties in the Properties panel.

When someone uses your app, they will interact with your user interface, by clicking buttons, entering text etc. It is up to you to decide what your app should do and to program it to do those things.

BLOCKS EDITOR

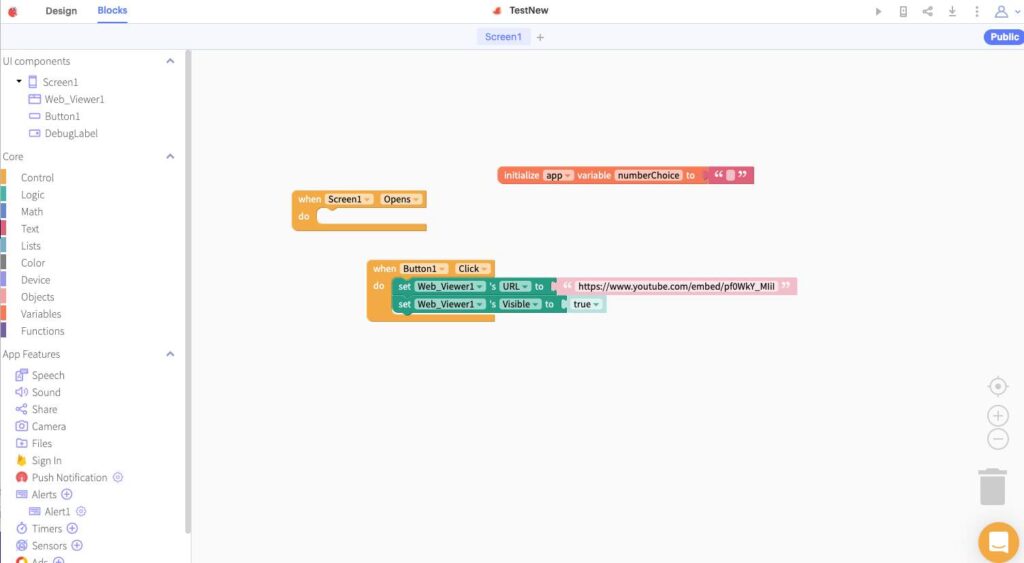
Clicking on “Blocks” takes you to the Blocks Editor window, where you do all your coding. You drag blocks from the panel on the left into the workspace in the center of the screen.

Thunkable blocks editor
1
Blocks Palette

On the left, you will find the blocks palette. At the top are the UI components. Each component in your app has its own set of blocks. You will click on the component to show the blocks you can drag into the workspace.

4

Coding Workspace

This is your workspace where you drag all your blocks. You can move them around, snap them to and into each other. You can also delete any blocks you don’t need.

2

Core Blocks

The core blocks are standard coding blocks to use in your app. They are categorized according to their type and color coded.

3

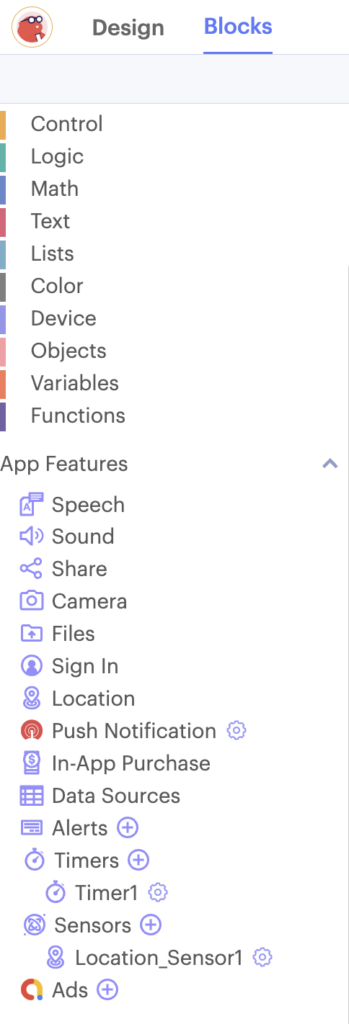
App Features

These are invisible features you can add to your app. You can click on one to add it, and then set properties and drag out code blocks for that feature.

EVENT HANDLERS

Event handler blocks in Thunkable are a gold color and are shaped as an open block, so you can snap blocks inside of it. Those blocks run only when that event happens.

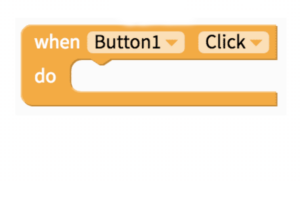
Thunkable button click event block

When Button is Clicked
You’ve already used this. When the user clicks a particular button, you would want the app to do something, like open another screen, or send a message.

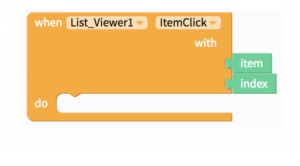
Thunkable list-viewer item click event block

When ListViewer Item is Clicked
A ListViewer is like a dropdown menu, so this event happens when the user chooses an item in the list. The app should do something with the item that is clicked.

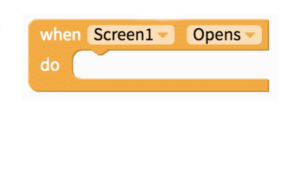
Thunkable screen opens event block

When a Screen opens
This event is used when you want to do something when the app first starts or the app switches to another screen. You can set variables, or update information from the cloud.

FUNCTIONS

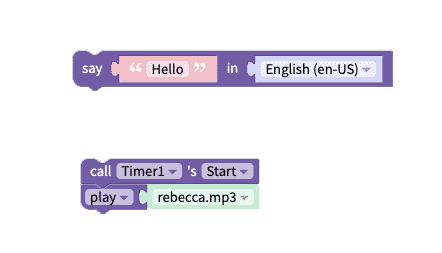
Functions are blocks of code that do something. They can be run many times within an app. In Thunkable, functions blocks are colored purple. Some languages refer to functions as methods, or procedures. They do something, so you can think of them as action blocks.

function blocks

Say
This function lets the app say or speak whatever text you want it to speak.

Timer Start & Sound Play
The Timer component can start counting.  And the app can play a sound.

SETTERS AND GETTERS

Green blocks relate to the component’s properties. 

The light green blocks are called getters, because you are getting the value of the property.

Thunkable getter blocks

Text of Button1
The Text is gotten and saved in the variable numberChoice.

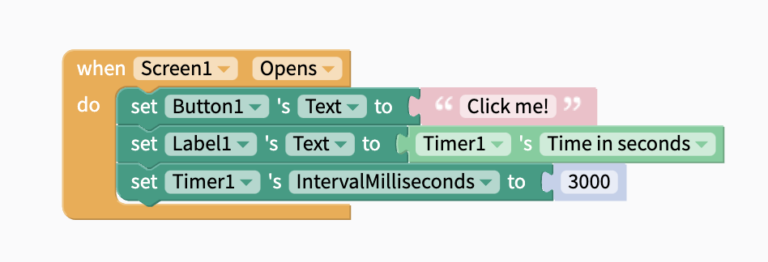
Timer1's Time in seconds
The value of the timer's seconds is gotten and stored in Lablel1's text, so the value is displayed in the label. 

Setters are darker green, and they can be snapped to, with an open slot on the end. This allows you to set the value of the property.

Thunkable setter blocks

Text of Button1
Button1’s Text is set to the words “Click me!”

Label1.Text
Label1’s Text is set to Timer1’s Time in Seconds.

Timer1's IntervalMilliseconds
Timer1’s IntervalMilliseconds (how often it goes off) is set to 3000, or 3 seconds.

Best practices: Remind the students that this is exactly like what real coding is like. The weird vocabulary (functions, getters, setters) that we are using is exactly what coders use.


Guiding Questions to ask students: Can you think of some day-to-day functions you do? (example: baking a cake, brushing your teeth – anything that has repeatable steps). Functions are very similar to algorithms!

Mentor tips are provided by support from AmeriCorps.

stylized A, AmeriCorps logo in navy

DATA BLOCKS

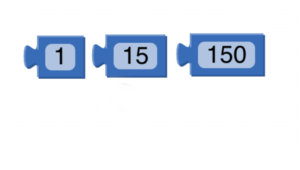
When you use setter blocks, you might use some other built-in blocks that represent data, or information that can be used in your app. Some examples of data blocks that can be used are seen below.

thunkable math blocks

Numbers
Number values can be used as data in an app. These blocks can be found in the Math drawer in the core section of the blocks palette.

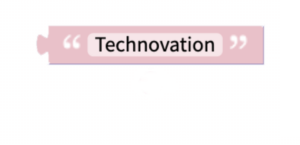
thunkable text block

Text or Strings
Text, sometimes called strings, can be used as data. These are letters, words, and sentences that can be used in an app. The blocks are found in the Text drawer of the Core section of the blocks palette.

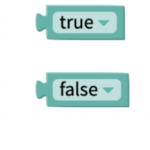
thunkable boolean blocks

Boolean
This data type has only two possible values – true or false.  These blocks can set or test the “state” of something and will be used in conditionals, which you will learn more about.

ACTIVITY: SOUNDBOARD TUTORIAL

Estimated time: 45 minutes

Follow the video tutorial below

Download media files here (watch Dave’s video for more details)
Then follow Dave's video below to use Event Handlers and Functions to play speeches in your app.

CHALLENGE

In the activity, you have used:

  • Event Handler blocks
  • Function blocks

Let’s try using some setter and getter blocks by adding to your Soundboard app.

When the user clicks on any picture to play the associated speech, change the background color of the screen. 

You can change it to one particular color, but then you cannot easily change it back to the starting color, black, so instead, change the screen’s background to a random color. 

 Hint: Check the Color drawer to see how to get a random color.

REFLECTION

Now that you’ve learned a little bit more about the different code blocks, think about your app solution:

What components will you need for your app?
What events will need event handlers in your app?
What are the actions that will happen when the events are triggered in your app?
Previous slide
Next slide

REVIEW OF KEY TERMS

  • User Interface – everything in your app that a user can interact with
  • Designer – window where you can add components to your app and design how they look
  • Blocks Editor – window where you code the blocks for your app
  • Event – something that happens to trigger code to run
  • Event Handler– code blocks that tells your app what to do when an event happens
  • Event Driven Programming – programming based on events, rather than running entire code from top to bottom
  • Functions – a block of code that runs, and can be run multiple times

ADDITIONAL RESOURCES

Check out more of Dave Wolber’s Thunkable tutorials at draganddropcode.com

Student Ambassador Meenakshi Nair’s free Thunkable course on Udemy is another great resource!

girls coding with mentor helping

Thunkable: Coding Conditionals

  • Learn about conditional statements and how to write them
  • Practice writing conditional blocks with a simple app

These are the activities for this lesson:

CONDITIONS

Mobile apps don’t run exactly the same way every time you open it. It runs based on your interactions as a user, which are not always exactly the same.

We have already learned about event handlers, and how they trigger certain blocks of code to run when events happen.

In addition to event handlers, there are other ways that apps decide what particular blocks of code to run, and when. These are called conditions. And the blocks associated with conditions are called conditional blocks.

man at fork in the road

Best practices: There is a fun programming joke you can use to illustrate how confusing conditionals are: My wife said: “Please go to the store and buy a carton of milk and if they have eggs, get six.” I came back with 6 cartons of milk. She said, “Why did you buy six cartons of milk?!?!” 

It’s a fun brain teaser and it shows how dumb computers are sometimes. The first column of code on the left is what happens based on the ask, I buy 6 cartons of milk. The second column of code on the right is what should happen, where I end up buying 6 eggs.


I bought 6 cartons of milk, because she said “buy milk and if there are eggs, get six.” Her ask actually reads as “buy milk and if there are eggs in the store, buy six cartons of milk.” She needs to specify “six eggs.” 

This is how computers work, they will only work with the information you give them, so make sure it’s specific.

Guiding Questions to ask students: What are some of the conditionals on your favourite apps? (ex: if you are logged in to tiktok the fyp pulls from your list otherwise it is random, If the user has dark mode enabled, turn everything to black)

Mentor tips are provided by support from AmeriCorps.

stylized A, AmeriCorps logo in navy

EXAMPLE

girl holding umbrella in the rain

A real life example of a condition is the weather.

You make decisions based on that condition.

If it is raining, you use an umbrella.

The condition is “raining”.

  1. You determine if that condition is true or false, by checking a weather app or looking out the window.
  2. You then take action based on the condition.
    1. If it’s raining, you take your umbrella.
    2. Otherwise, you skip it and go out the door.

You make all sorts of decisions based on conditions around you. Mobile apps also make decisions based on conditions within the app. For example, if the user inputs a wrong password, the app displays a message telling the user so and prevents them from going further in the app.

Conditionals are fundamental to all programming languages, including Thunkable.

The structure of a conditional block in Thunkable is

if condition do

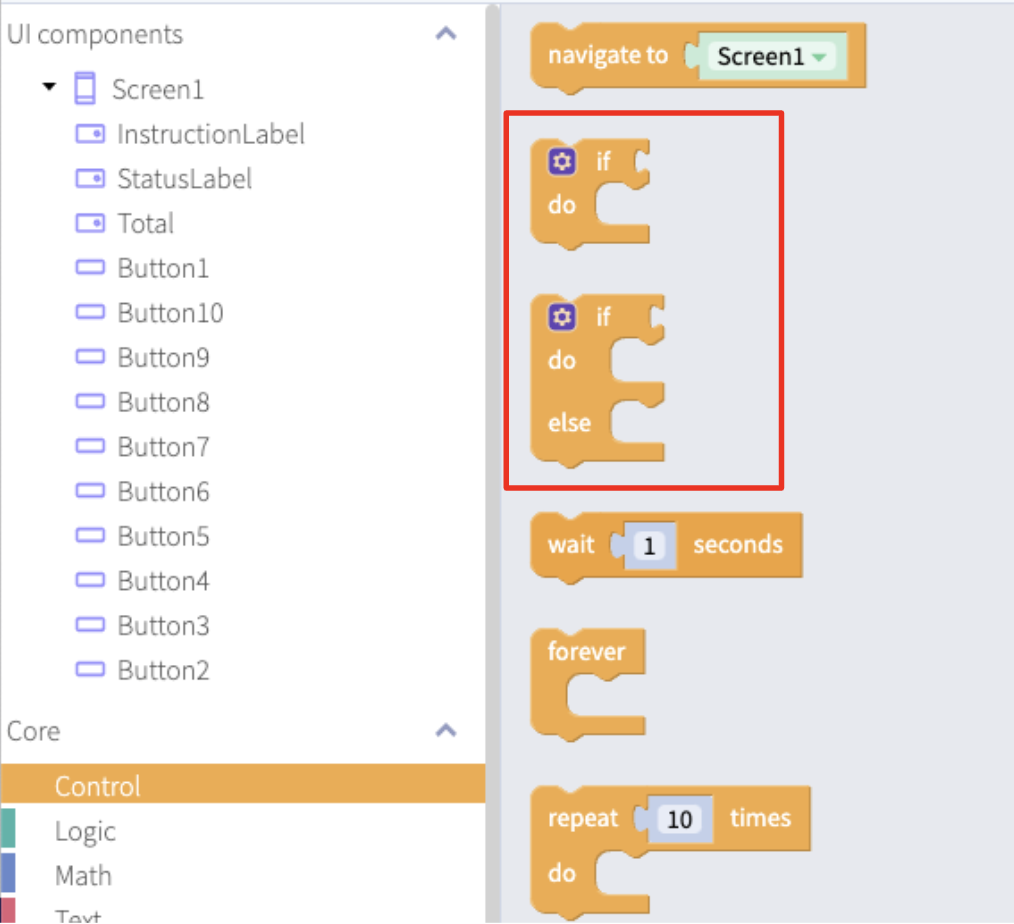
Conditional blocks can be found in the Control drawer of the Blocks Editor.

thunkable conditional blocks

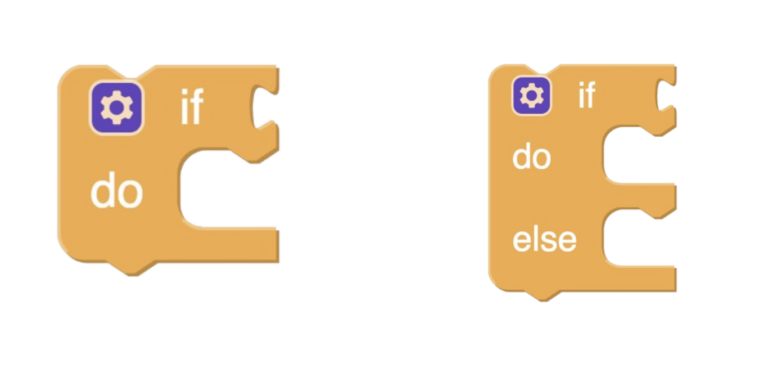
Here is how these blocks work.

Thunkable conditional blocks

The condition snaps
to the if.

If the condition is true,
the code in the do slot runs.

With if/else blocks, if the condition is true, the code in the do slot runs.

If the condition is false, the code in the else slot runs.

If the condition is false, the code is skipped and nothing happens, or the code continues to run after the if block.

You can change your conditional blocks by clicking the blue gear icon.

Then drag more else if or else blocks in.

The else if block allows you to test for multiple conditions in one block.

thunkable conditional example block
if else block
if else-if else block

If it’s raining,
     use umbrella.

One condition, one option. Otherwise, do nothing.

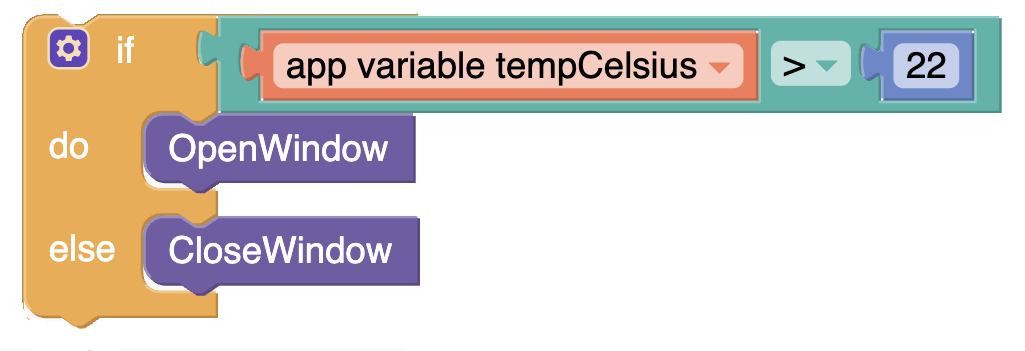
If the temp is greater than 22C, 
   then open window
else close window.

One condition, but two options.
One for true, one for false.

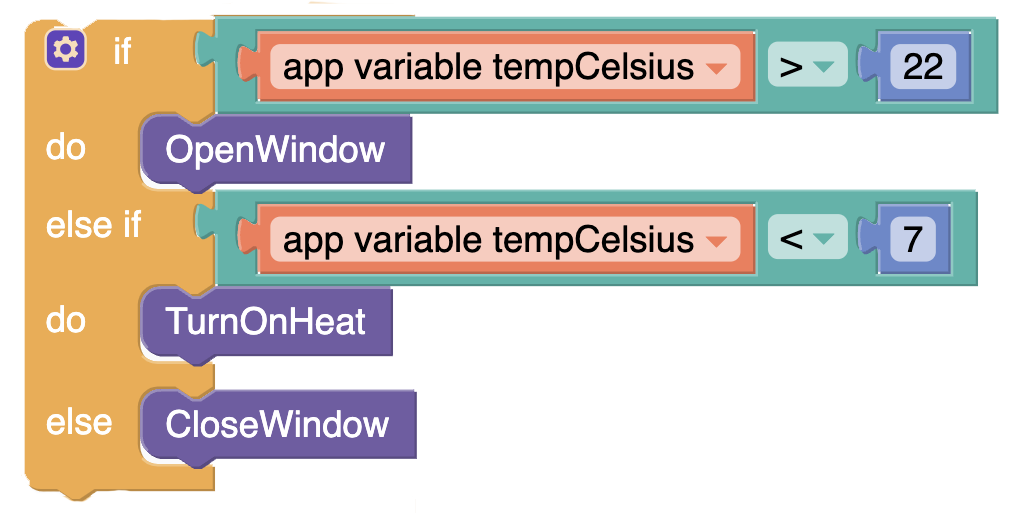
If the temp is greater than 22C
     then open window
else check if temp is less than 7C 
    If so, turn on heat
else, just close the window. 

Two conditions checked,
but 3 options.

IMPORTANT! The order in which you test multiple conditions does matter. Once a condition is found to be true, it executes that code and skips over the rest.

So, in the third example, if the temp is greater than 22, it opens the window and doesn’t check the second if block.

LET'S TRY A CODING EXAMPLE

The Counting Game is a simple app where you (and possibly an opponent) keep adding numbers to a running total, and try to hit 100 exactly. If you go over, you lose.

ACTIVITY: COUNTING GAME

Estimated time: 20 minutes

Complete the Counting Game using Conditionals

Open the starter project in Thunkable and make your own copy by pressing the "click to remix" button.

Then follow the instructions in the worksheet to complete the app!
Open worksheet

Hopefully you have successfully coded the Counting Game using conditional blocks!

If you wish to see a possible solution, click this button.

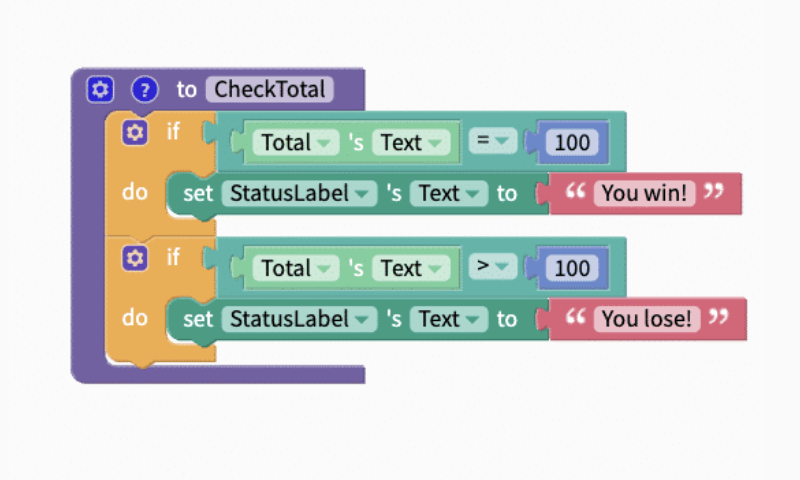
solutions for checktotal function

CHALLENGE

Add a Reset button to the app.

The Reset button should set the total back to zero so the user can play again.

REFLECTION

Can you think of conditionals that you use to make decisions every day? Here are some examples:

post with different directions to go
If it is cold outside, then wear a jacket.
If your phone is dead, then charge it.
If you are sick, then go to the doctor, else go to school.
If your clothes are dirty, then wash them, else put them away in your closet.
Previous slide
Next slide

REVIEW OF KEY TERMS

  • Conditions –  a state or situation something is experiencing
  • Conditionals statements or blocks –  a way for computers to make decisions based on conditions
  • if/else – a common form of conditional statements in programming; tells the computer that if the condition is true, do this. Else, if the condition is false, do another thing

ADDITIONAL RESOURCES

If you want a little more practice, this video covers conditionals in Thunkable in another simple app.

girl using tablet

Debugging your Code in Thunkable

Learn tips for debugging your code and fixing errors in Thunkable

These are the activities for this lesson:

WHAT IS DEBUGGING?

Debugging is the process coders use to figure out why their code isn’t working, and then fix it so it does work. 

The term debugging came from Admiral Grace Hopper, a pioneer in computing. She was working on the Mark II computer at Harvard University in the 1940s and a moth got stuck in the computer and stopped it from working.

Getting rid of the moth, she said they were “debugging” the system. Programmers use the term now to mean “fixing errors in my code”.

Grace Hopper

CODING TIPS

dog looking at computer

Debugging can often be the most frustrating and time-consuming part of coding, so it’s really important to leave plenty of time for it!

And also to be patient!

SMALL CHUNKS

Sometimes programmers are tempted to code their entire app in one go, then test it.

Don’t fall for that temptation!!!

If something doesn’t work correctly, which is likely, it’s hard to figure out where to even start to try to fix the error. 

chunks of chocolate

Break the coding for your app into small chunks. 

Get one thing working before starting on the next thing. 

Code a little bit, test a little bit, confirm it works, then code a little more, test a little more, etc. 

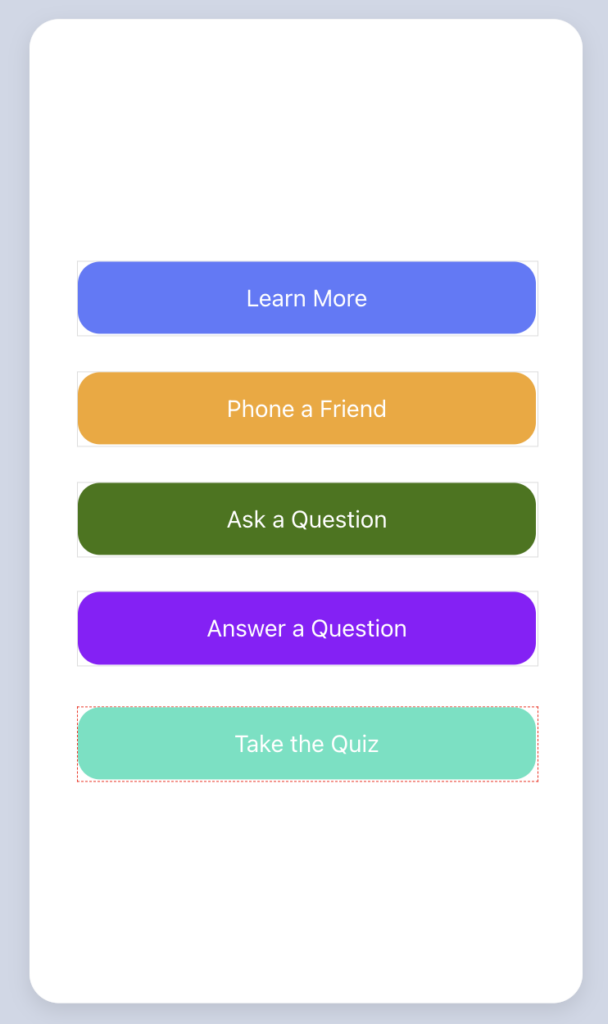
For example, if your app has 5 buttons that all do different things,

  1. Code the action for the first button
  2. Then test to make sure it works.
  3. Move onto the second button
  4. Repeat.

It’s better to fix code in one place than go back and fix it in 5 places if there is an error in your code.

5 buttons in an app

VERSION CONTROL

it began as a mistake

Let’s say you follow the “small chunks” rule and have one part of your app built and working.

You add some new code and suddenly everything stops working. 

OH NO!

You try to delete the new code but your app still isn’t working. You aren’t sure what went wrong and wish you had an “undo” button.

To avoid scenarios like this you can save versions of your app as you get parts working. 

That way if you make a mistake and don’t know how to fix it, you can go back to the last working version you saved.

You can also use version control to experiment with new features without worrying about breaking your working app.

The free version of Thunkable has a 10 project limit, so if you reach your project limit, you can delete the oldest versions before saving a new one. 

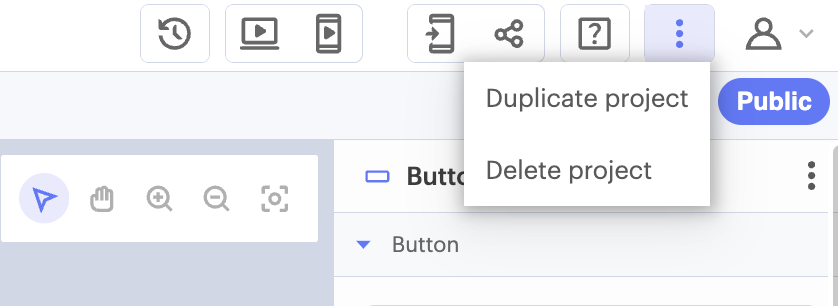
To make a copy of your project:

  1. click on the 3 dots in the upper right corner of the screen
  2. Select “Duplicate Project”  from the dropdown.
  3. Rename your saved copies to keep track. Numbering v1, v2 works well.
screenshot of thunkable duplicate project menu

COLLAPSE BLOCKS

Collapsing blocks is a way to keep your code organized, as your code workspace starts to get crowded with blocks.

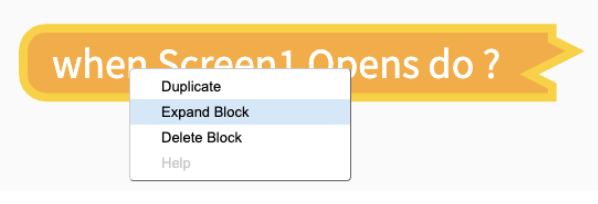
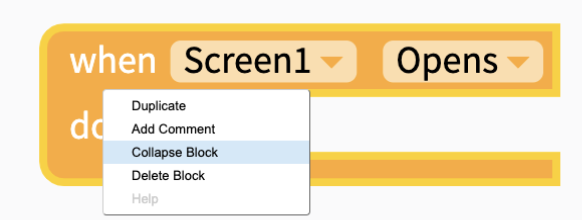
If you right-click on a block, you’ll see an option to collapse it.

To expand your blocks again, right-click on them and select Expand Block.

screen opens block being collapsed
expanding collapsed block

Collapsed blocks will compress it down to one bar on your screen.

They still work the same as regular blocks, they just take up less space. This can be helpful if you have blocks you no longer need to edit and want to clean up your screen

collapsed block

DISABLE BLOCKS

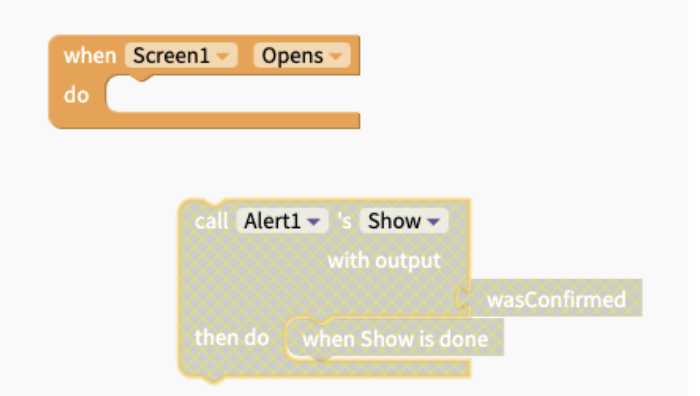
You can also disable blocks.

They remain on your screen but don’t run in the app.

With disabled blocks, you can test your app without certain code blocks. You can enable them later and they will run.

You can also disable blocks that you have used for testing only, like Alerts.

disabled alert block

Simply dragging blocks out of an event handler block will disable them and prevent them from running. Because they are not part of any event, there is no way they will ever execute. They will appear greyed out. You can always snap them back in to enable them again.

COMMENTS

Programmers often leave comments in their code to explain what it does. 

Comments can be helpful when other people are looking at your code, such as teammates, mentors, and judges.

Comments can also help if you return to your code later and have forgotten what parts of it do.

To add a comment, right-click on the blocks and select “Add Comment”.

After that, a question mark will appear in the corner of the block and you can add text. You can view the comment by clicking on the question mark.

comment box above code block

Best practices: Comments are the most helpful thing in programming.

There have been many times when a coder has coded something and then gone to sleep and come back the next morning and have no clue about what they were doing the night before. Always write comments!

It’s also a great way to check your knowledge, because if your coding blocks are easy to comment on then you must understand them really well! Another thing to be aware of is that <, >, =, ≤, ≥ are hard for students for the first time (and for programmers who are years into their careers). When we set a math statement to < when it should be ≤ this is called an “off by one” error and this is a problem that happens to developers with 20 years of experience 😛 It is a very popular problem so be on the lookout for that. 

The best type of debugging is rubber duck debugging! This is where you are really stuck in your code and it makes no sense. You want to take some time to talk through it with someone else to see if they can spot the problem but unfortunately no one is around! So you have a trusty rubber duck at your desk and you explain the problem outloud to your duck friend. You have to do it in very simple terms for them to understand though and then after that you will find the problem yourself! All of my coworkers do have rubber ducks at our desks and do this quite often!

Guiding Questions to ask students: How long do you think it takes experienced coders to debug bugs? You would think they could get really fast at it but each big site has pages dedicated to seeing how long bugs are in existence (Facebook for example) and they will also show if any of their pages are down/broken and they are currently debugging (Facebook example).

How do you find bugs? (lots and lots of testing!) How much testing do you think you should do? How much testing should you get other people to do?

How do you know when you have found a bug? Sometimes you may spend forever clicking on an image only to realize that the button you’re supposed to be clicking is under the image. Is that a bug? It’s a design choice that the app maker made and they don’t think it is a bug but you might.

Mentor tips are provided by support from AmeriCorps.

stylized A, AmeriCorps logo in navy

DEBUGGING TIPS

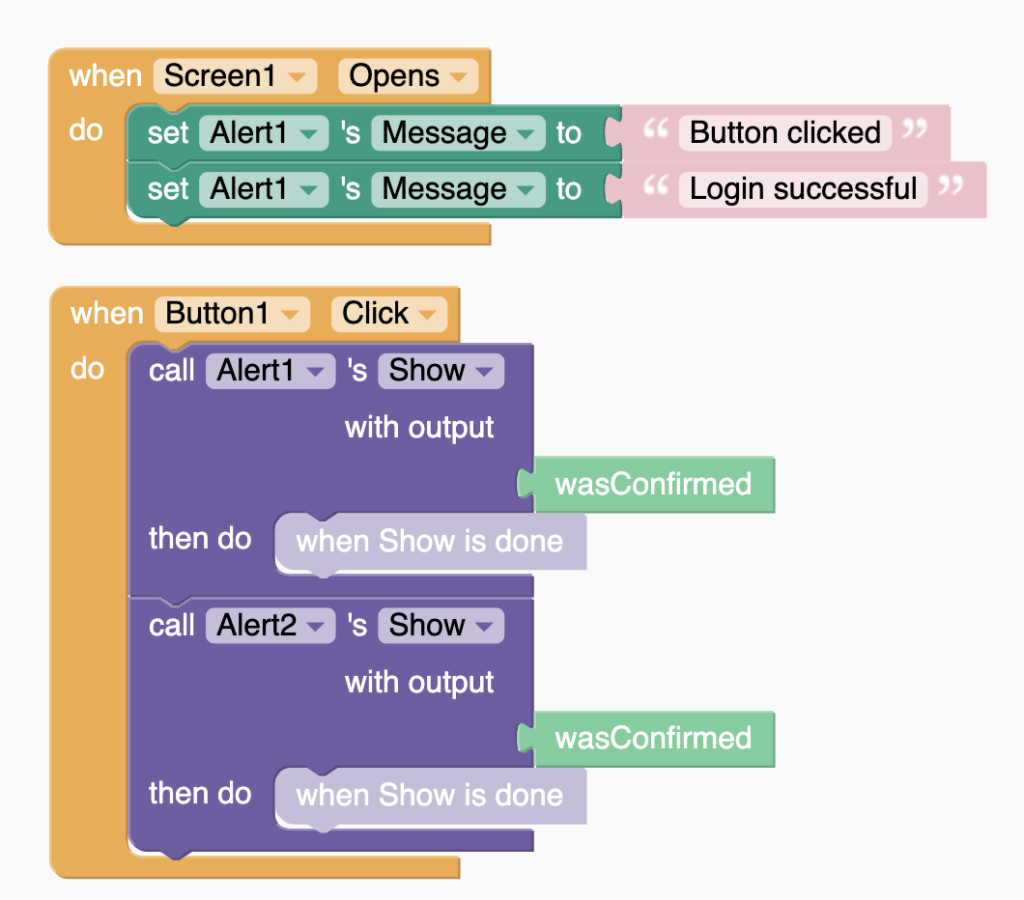
ALERTS AND LABELS

You can use components, like Alerts and Labels to display information as you test. Once you have fully tested the app, you can just remove them

You add an Alert in the Blocks window by clicking the + sign next to Alerts in the Palette.

code for alerts

Set the Alert Message to the information you want to track. 

Then use Alert.Show in your code to display when an event happens.

In addition to messages, you can display information like the value of a variable or the position of a Sprite.

You can also add Labels to display current information in your app. 

For example, you might want to know the value of a variable as certain events happen while the app is running. 

You can set the Label.Text to whatever it is you want to know and it will display on your app. 

Once you’ve debugged your error, you can either make the Label invisible, or delete it altogether from your app.

USE TEST DATA

If you have a lot of information to use in your app, it can be helpful to use test data. Test data is a simpler, smaller set of data that you can use to make sure your app is working correctly.

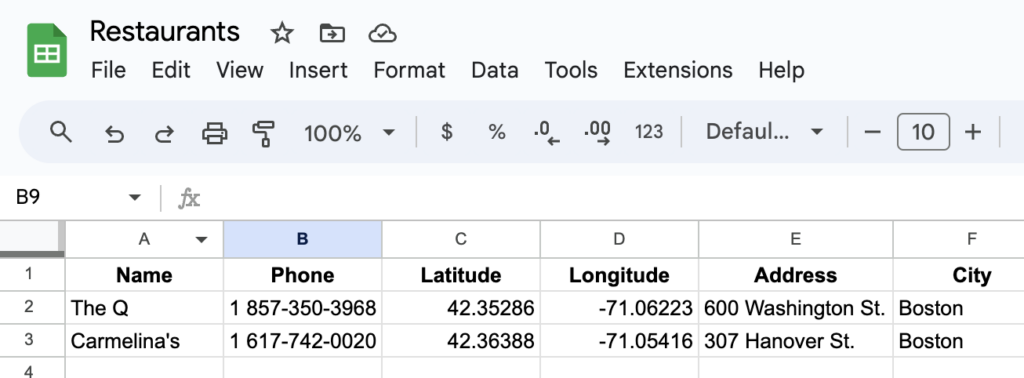
Let’s say you are making an app that displays nearby restaurants. You are using Google Sheets to store the restaurant information.

You can start with just one or two test restaurants and test your app to make sure it works.

Once it’s tested and working, you can add the complete set of restaurant data to your Google sheet.

CHANGE PROPERTIES

If you are live testing your app, you can change a property value in the Designer while you run the app and see its effects.

Sometimes this can help  uncover an issue.

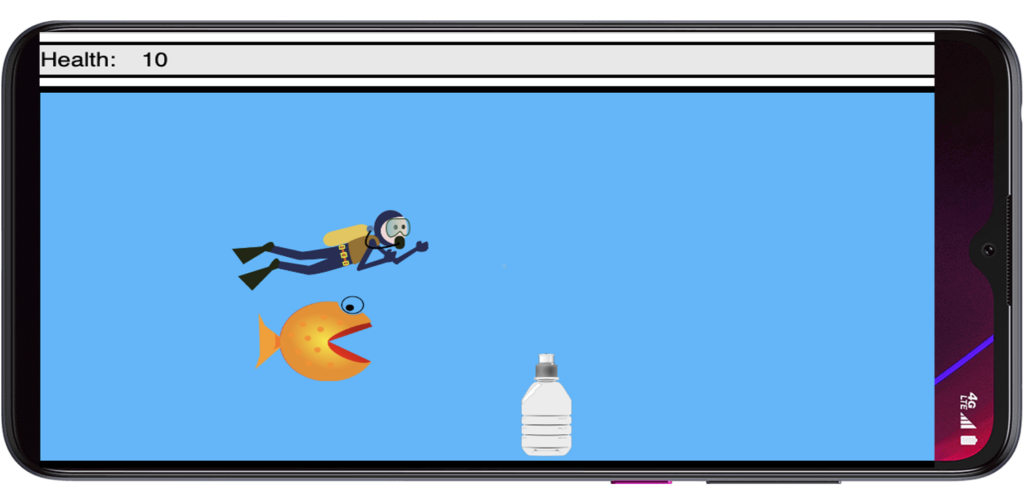
For example, you might be coding a game. A sprite’s position doesn’t look right to you on your phone when it’s running.

While live testing, you can

  1. Go to the Designer
  2. change the X and Y values of the Sprite
  3. The position of the Sprite on the screen in the running app will change. 

Use this to test and understand coordinates on your screen.

game with sprites

ACTIVITY 1: FIX THE BUG

Estimated time: 20 minutes

Fix bugs in the Timer App

This Timer App has a couple of bugs in it.

  1. Copy the project.
  2. Preview the app to run it.
  3. Try pressing Start without typing anything into the textbox. What happens?
  4. Try entering 0 or a negative number for number of seconds. What happens?
  5. Fix the bugs using conditional blocks!

ACTIVITY 2: ADD A COMMENT

Estimated time: 10 minutes

Add a comment to your Thunkable project

If you have started your final app for Technovation, use that app for this activity. Otherwise, use the Timer App from Activity 1.

Add at least one comment to your app explaining what a group of blocks does. Pick a group of blocks that you think it is the hardest to understand because those blocks would probably be the hardest for someone else, like a team member, to understand.

REFLECTION

These tips can help you as you start to code your mobile app for your Technovation project.

But remember…

Photo courtesy DKJS Franziska Schmitt
Coding is not easy.
Chances are good that your app won’t work perfectly to start!
Code in small chunks.
Celebrate when you get a small part of your app to work.
Take breaks! Sometimes just walking away from your computer for a few minutes can give you the fresh perspective you need.
Previous slide
Next slide

REVIEW OF KEY TERMS

  • Debugging – the process coders use to figure out why their code isn’t working and fix it
  • Version Control saving working versions of your app as you make progress
  • Test data – a simpler set of data that you can use to make sure your app is working correctly
  • Comments text that is included in code to explain what it does

ADDITIONAL RESOURCES

Here are some more Thunkable debugging resources.

girl typing at laptop

Different Components in Thunkable

  • Review different components you can use in App Inventor or Thunkable
  • Find one component that can help your app
  • Research a tutorial and code at least one component into your app

These are the activities for this lesson:

SMARTPHONE COMPONENTS

It’s time to choose and code the components, some of which include sensors, that you want your app to use.  The various components available will allow your app to do many different things – be sure to choose the ones that are right for you! 

This lesson is a reference for you to learn about many components you can use in your app. 

You probably have chosen your platform by now, but we’ll list all the components for both App Inventor and Thunkable, just so you can be aware of available components.

Look for the components that you can use to implement the features you have planned for your app.

girls looking at laptop

COMPONENT LIST BY CATEGORY

The components that follow are ones beyond the standard User Interface components, that allow the user to interact with the app. 

This is not a complete list, but does cover most of the currently available components. Thunkable and App Inventor continue to add more features and components all the time.

The information below is also available in this document.

If your app needs features related to things like photographs, audio, and video, these components will be very helpful for you.
Feature Description App Inventor Thunkable
Allows the user to take videos. You can use it for social apps, video sharing apps, or anytime else that you would want your user to record a video. Camcorder Camera
Allows the user to take pictures. This can be useful for apps that allow users to set profile pictures or take pictures to share or save to a gallery. Camera Camera
Allows the user to pick an image from their photo library. It will allow users to pick photos that they have taken outside of using your app. ImagePicker Files (photo library)
Allows you to embed a video into the app that the user can click on. The video must be a .wmv, .3gp or .mp4 and not be bigger than 1MB. VideoPlayer Video
Allows you to translate text into another language. It requires that your app has internet access since it relies on external translation services. Translator Speech
Allows a user to record a sound or noise. SoundRecorder Sound
This audio component plays a sound. This works best for “long” sounds, such as songs, speeches, or poems. Thunkable has just one component, Sound, for any length audio. Player Sound
Very similar to the Player component, but is best for short sounds, like notification “dings”. Sound Sound
Translates the user’s speech into text. This is especially useful for apps that require hands-free capabilities. SpeechRecognizer Speech
This component does the reverse of SpeechRecorder; it allows users to enter text and the app will read it out loud. TextToSpeech Speech
You can make a JSON animation play in your app. Not available Animation
If you need your app to make phone calls, send emails, text and share certain types of information, these social components may be helpful.
Feature Description App Inventor Thunkable
Displays the user’s contacts and allows users to choose someone from that list. ContactPicker Not available
Allows the user to input an email address from the user’s contact list. EmailPicker Not available
Allows the user to pick a phone number from a phone contact list. PhoneNumberPicker Not available
Allows you to embed a video into the app that the user can click on. The video must be a .wmv, .3gp or .mp4 and not be bigger than 1MB. VideoPlayer Video
Enables the user to make a phone call from your app. PhoneCall Share
Allows the user to send a text message to another user’s phone through your app. Texting Share
This audio component plays a sound. This works best for “long” sounds, such as songs, speeches, or poems. Thunkable has just one component, Sound, for any length audio. Player Sound
Allows users to share messages, images, or other content in your app with other apps on the user’s phone, like email and messaging. Sharing Share
Allows communication between your app and Twitter. Users can search for tweets, send and receive messages, get a list of followers, and more. Twitter Not available
Thunkable allows you to add ads to your app. All apps must be first approved by Thunkable before they can be downloaded or published. Not available Ads
These components allow your app to interact with entities outside of your app, like the web, devices, and other apps.
Feature Description App Inventor Thunkable
Allows your app to start up other apps, like Camera or Google Maps, or user-created apps installed on phone. ActivityStarter Open link (Control block)
Allows you to embed a map into your app. App Inventor includes components like Markers and Shapes that can be added to a map. These features are added in code in Thunkable. Maps Maps
Allows users to view web pages within your app. WebViewer Web Viewer
Enables your app to send and get information to and from external websites. Web Web API
Enables the user to make a phone call from your app. PhoneCall Share
These components enable your app to connect with Bluetooth devices. Bluetooth Client, Bluetooth Server, BlueToothLE (extension) Bluetooth Low Energy
This audio component plays a sound. This works best for “long” sounds, such as songs, speeches, or poems. Thunkable has just one component, Sound, for any length audio. Player Sound
Used to collect data from external sources (sensors, web, data files) and display them in chart form. Chart, ChartData2D Not available
Can be used to connect to serial devices like Arduino. Serial Not available
Allows users of your app to sign up with a username and password. This requires you first set up a Firebase account. Not available Sign-in
Allow you to embed a pdf file within your app Not available PDF Reader
If your app needs to gather information about the world around it or the user, here are some sensors that App Inventor and Thunkable can access.
Feature Description App Inventor Thunkable
Can determine if the phone is shaking and if it’s being held upright or upside-down. This capability is very useful when you want the screen to reorient in response to how the phone is being held, or if you want the app to react to shaking. AccelerometerSensor Accelerometer
Uses the accelerometer sensor to measure how many steps the user holding the phone takes, and can also estimate distance traveled. Pedometer Not available
Can sense if the phone is being tilted. It is more precise than the accelerometer and can measure how much the orientation of the phone has changed. GyroscopeSensor Gyroscope
Used to measure magnetic flux density. Not all phones support this capability. MagneticFieldSensor Magnetometer
Allows your app to get the current time or use a timer. This can be useful for setting a timed alarm or using a timer. Clock Timer
Collects the latitude and longitude of the phone’s location. This sensor can be useful anytime you need to search for points of interest near the user. LocationSensor Location Sensor
Tells if the phone is in close proximity to an object. It is often used to tell if the user has the phone close to their ear. Not all phones can support this capability. ProximitySensor Not availalbe
Allows your app to read a barcode. BarcodeScanner Camera
Measures the ambient air pressure. Barometer Not available
Measures the relative ambient air humidity. Uncommon for most mobile devices. Hygrometer Not available
Measures the light level. LightSensor Not available
Allows your app to share data with other NFC (Near-field Communication) -equipped devices. NearField Not available
Provides information about the device’s physical orientation in three dimensions: roll, pitch, and azimuth. OrientationSensor Not available
Measures the ambient (external) temperature. Thermometer Not available
Your app can store data within the opp, on the device, and in the cloud with these components.
Feature Description App Inventor Thunkable
Block that lets you update and store information within the app. Any information is erased when the app is closed. Variable app Variable
Allows your app to store and update information locally on the mobile device and use it within the app. Data can be stored and retrieved between runs of the app. In Thunkable, DataViewer and DataViewerGrid can store data locally using the “Create your own Table” option. TinyDB stored Variable DataViewer List Data Viewer Grid
Allows your app to store, retrieve, and update data in the cloud so data can be shared between different users of the app. Thunkable offers cloud variables using Firebase. DataViewer and DataViewerGrid can be linked to Airtable, Google Sheets, and Webflow. App Inventor’s Spreadsheet component links to Google Sheets. CloudDB FirebaseDB Spreadsheet cloud Variable – (Firebase) DataViewer List DataViewerGrid
Use machine learning models for classification and generative AI tools within your app.
Feature Description App Inventor Thunkable
Allows communication with an AI chat bot, OpenAI’s ChatGPT. Chatbot Open AI Services (text completion)
Allows you to include DALL-E in your app to create and edit images. Imagebot Open AI services (image generation)
Allows you to create your own machine learning model (image, sound, pose) and use it in your app. PersonalImageClassifier PersonalAudioClassifier PoseNetExtension TeachableMachine (note these all require you to add the extension) Not available
Enable drawing in an app, and add sprites to animate and create games.
Feature Description App Inventor Thunkable
Adds an area on the screen where users can draw. This is also where you can add sprites that you can animate. Canvas Canvas
These components are the elements that can be animated and interacted with inside a game or animation ImageSprite
Ball
Sprite

You will add components in the Designer window of Thunkable. You can search for a component by typing its name. 

In the new drag and drop version of Thunkable, any non-visible components will be found in the Blocks tab, not the Designer. So if you are searching for components and cannot find them, try looking for them in the Blocks tab.

Designer components list
Components in Designer Window
Thunkable components in blocks window
Thunkable non-visible components

ACTIVITY: LEARN A NEW COMPONENT

Estimated time: 60 minutes

Choose a component to learn about

  1. Choose at least one component or sensor that you think you will use in your app.
  2. Find documentation and/or a tutorial to use the component in an app.
  3. You can start here:
  4. Code an app using that new component

Best practices: The component that you pick does not have to be perfect for your app! As long as you are learning about a new component, that is what matters. Just pick something you think might work and if you figure out it doesn’t work that’s okay. In the coding world we call this research a “spike” because you are trying to quickly dig as deep as possible (kind of like hitting a railroad spike into the ground).

Guiding Questions to ask students: If we were making an app for an Apple watch, what kind of components might be on the apple watch? (Heart rate monitor, gyroscope – for step tracking, bluetooth). How much data are you collecting? Could you use that data to train your AI model?

Mentor tips are provided by support from AmeriCorps.

stylized A, AmeriCorps logo in navy

One of the best skills you can learn as a programmer is how to find resources to help you when you are stuck or need to learn how to use something. 

This activity is practice!

It may not exactly align with the app you want to build, but practicing coding with components will help when you come to build your own app.

REFLECTION

This lesson is a reference for all of the components you can use to build your app. Finding a tutorial or documentation to learn how to use your component is not easy!

2 girls coding
How did you find the tutorial or information you needed for the activity?
How will you use your work from this lesson in your app?
Where else in your life where you can use this “find your own tutorial” skill?
Previous slide
Next slide

REVIEW OF KEY TERMS

  • User Interface Components – standard components a user would interact with like buttons, labels, and text boxes
  • Media Components – examples of media components are photos, audio, and video.
  • Sensors  – different types of devices installed on a phone that gathers data for various purposes
  • Social Components – features that enable users to make phone calls, send emails, text and share things through your app
  • Connectivity Components – features that allow your app to interact with places outside of your app, like the web and other apps
  • Storage Components – blocks and components that allow you to store information in the app, on the device, and in the cloud
  • AI Components – components that allow you to use machine learning models or generative AI tools within your app

ADDITIONAL RESOURCES

Other helpful tutorial sites for Thunkable

General resources

girls looking at desktop computer screen

Storing Data in Thunkable

  • Learn how to store data on a mobile device to access from a mobile app
  • Learn of different options for storing and accessing data in the cloud to share data between app users

These are the activities for this lesson:

STORING LONG TERM DATA

In the last unit, you learned how to use variables and lists to store information in your app. 

When the app is closed, all variables stored in the app’s memory are wiped away. 

There are times, though that you might want keep track of information between runs of the app.  There are two types of long term storage:

Local Storage

Store information on the mobile device to be retrieved each time the app runs.

For example, a user address or high game score.

Cloud Storage

Store information on the web (cloud) so all app users can access the information.

For example, game leaderboard or chat messages.

LOCAL STORAGE

Once the user closes an app, the values of all app variables get erased from the device’s memory. 

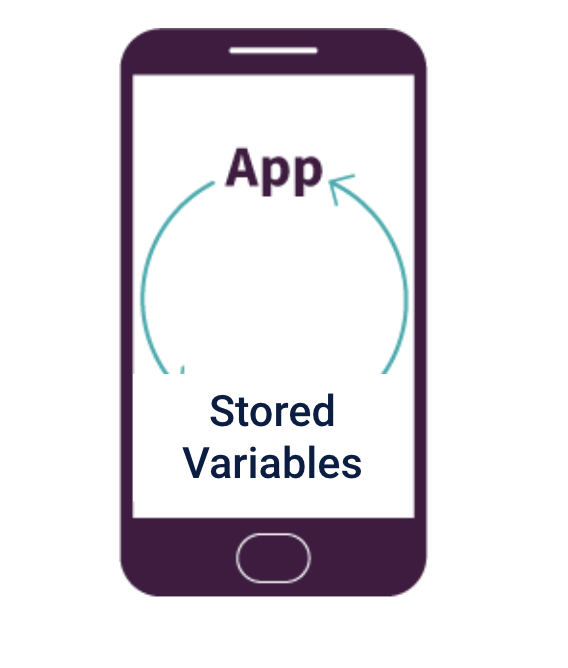
If you want to store data for the app between runs, you will use stored variables

Stored variables can be used to store a user’s personal information that does not need to be shared.

For example, the user wants to enter their name, age, address once, not every time they use the app.  Another example is tracking something like healthy habits over time. Stored variables are the solution.

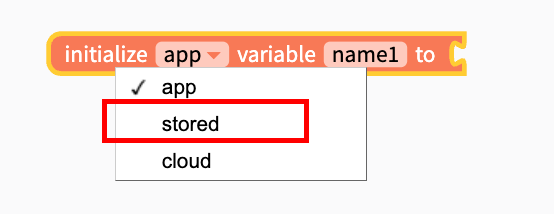
Stored variables work just like app variables. Just select stored from the dropdown menu in the initialize block.

With stored variables, there is no initialize value to set it to. The value of the variable will be null, or empty, until it is used in the app, so be careful using it!

You get and set the value of stored variables just like you would an app variable.

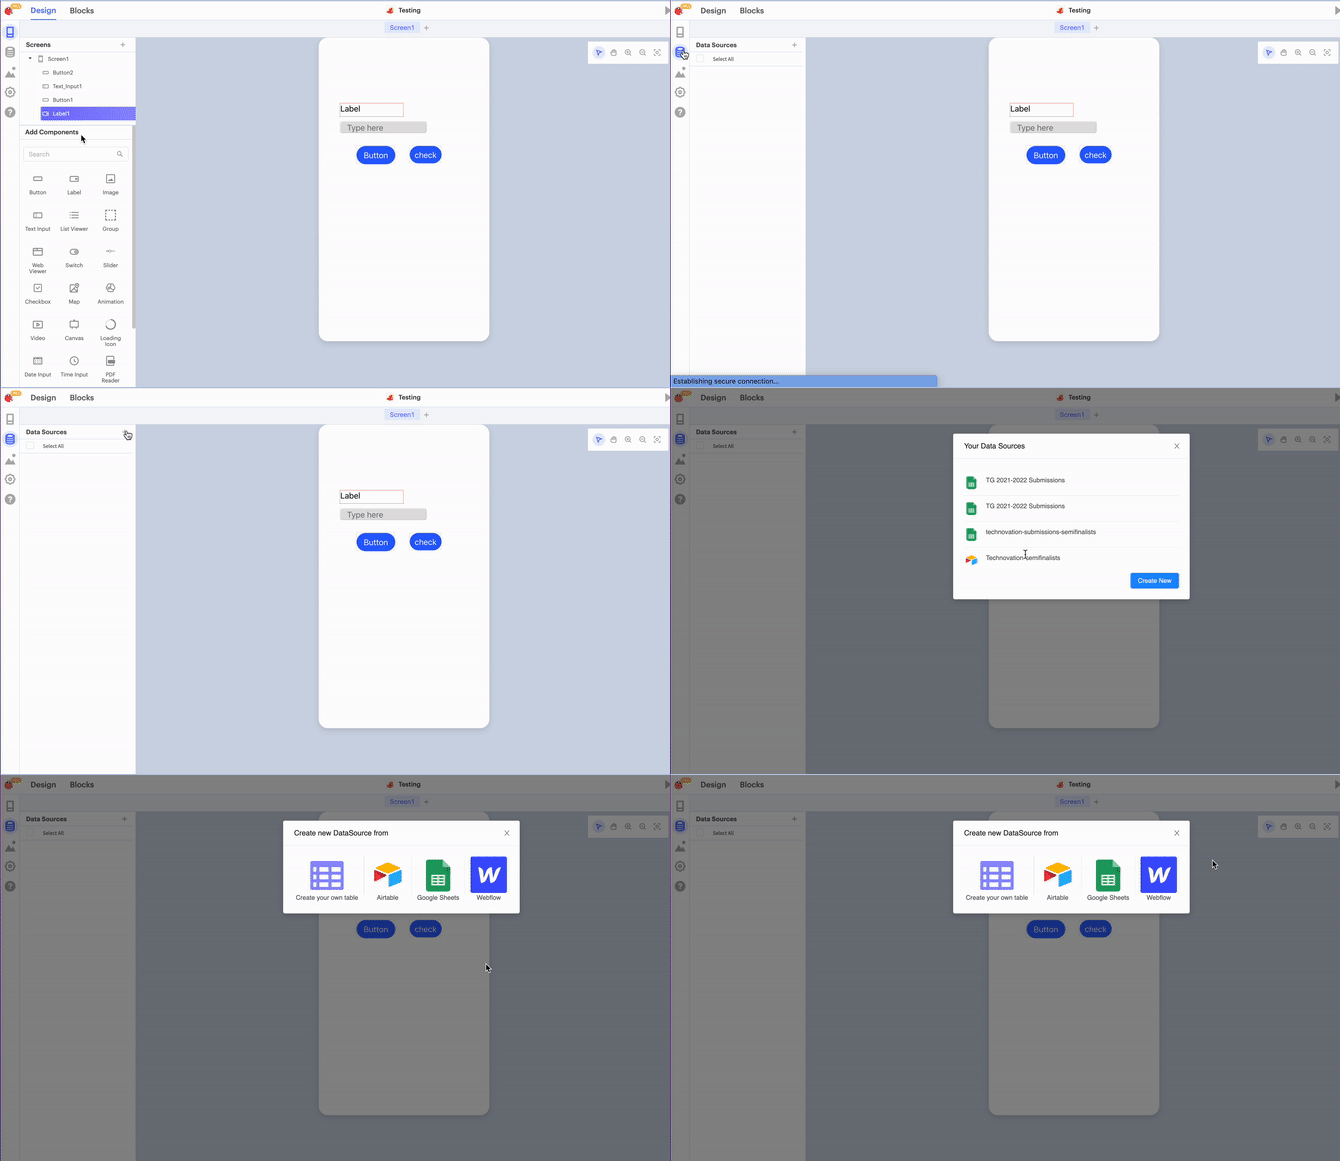
CLOUD STORAGE

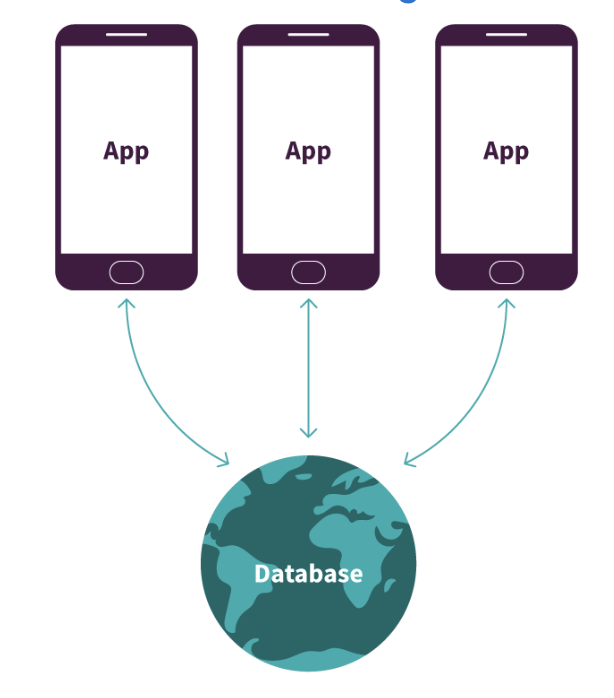
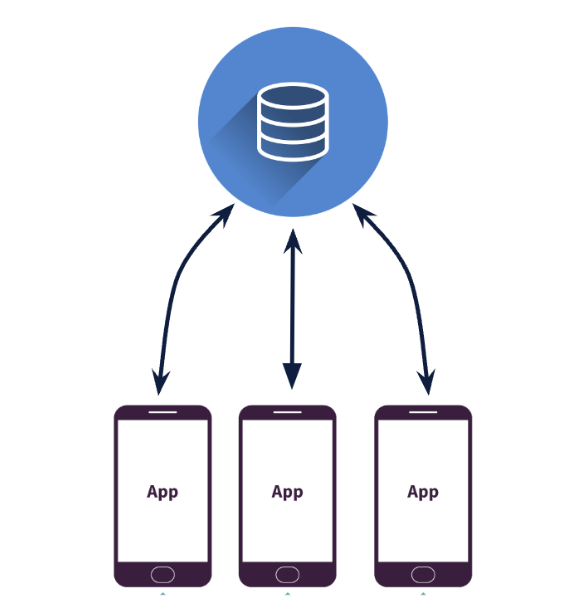
Cloud Storage allows any user of the app to access and share data. Multiple app users can store and retrieve data found in a database, which is simply a collection of data stored electronically.

Have you ever shared a picture or video on Instagram or TikTok? Apps like these use cloud storage. When your friend uploads and shares a picture, your phone checks the web database for new photos, and then you see it in your feed.

mobile phone with app showing stored variables
Stored variables
3 phones pointing to single database
Cloud Storage

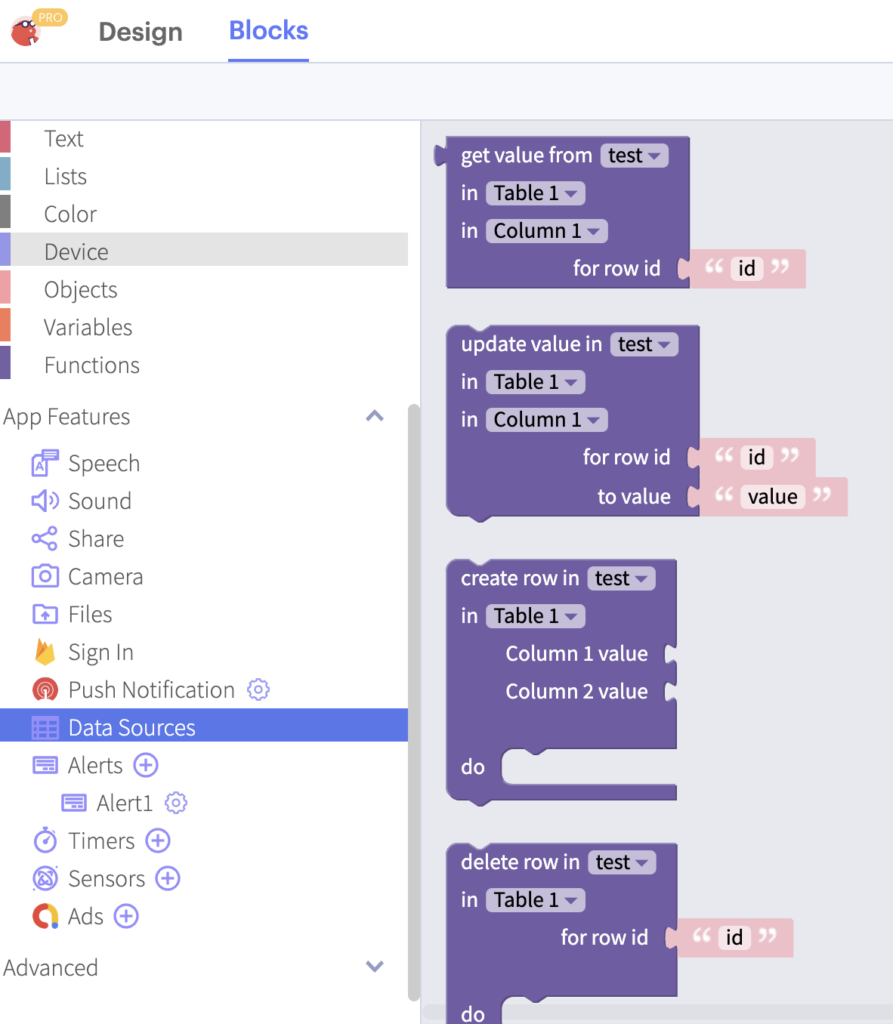
Thunkable has several cloud storage options.

Best practices: Always store a backup of your data somewhere! It’s very easy to delete or accidentally change your data, so make sure to store an extra copy somewhere safe!

Guiding Questions to ask students: Where do you think cloud data is stored? You upload it to a website like google, youtube, tiktok etc but where is it stored after that? Where is the cloud? Companies like Google have HUGE buildings with computers just to store stuff in the cloud. So the joke is: “It’s not stored on the cloud, just someone else’s computer”. Amazon’s data storage:

Mentor tips are provided by support from AmeriCorps.

stylized A, AmeriCorps logo in navy

ACTIVITY: STORE GAME SCORES

Estimated time: 60 minutes

Update the Quick Quiz Game to Store High Scores

  1. Open the starter project in Thunkable.
  2. Make a copy of the project so you can edit it.
  3. Follow along with the video below to link a Google Sheet to your app to store and update players' high scores.
Open Starter Project

CHALLENGE

Now that you have coded the Quick Quiz game to read, write and update personal high scores, can you:

  1. Read the high scores of all players and find the highest score of all players
  2. Report that information to the user
    • using a label
    • or add it to the Alert message

REFLECTION

As you start to code your own app for your project, consider these questions.

strings of numbers
What data will you need to store for your app?
Does it need to be stored
in the app,
on the user's mobile device,
or in the cloud for sharing
Is it a combination of storage requirements for your app? You can use all 3 options!
Previous slide
Next slide

REVIEW OF KEY TERMS

  • Database – an organized collection of information
  • Cloud Storage – information that is stored on the web so that any device connected to the internet can access it

ADDITIONAL RESOURCES

Here are more documents and tutorials for exploring cloud storage in an app.

girls pointing at computer screen

Coding APIs with Thunkable

  • Learn what Application Programming Interfaces (APIs) are 

  • Use an API in an app to get information

These are the activities for this lesson:

API

API stands for application programming interface.

An API is a way you can get information from a website or database.

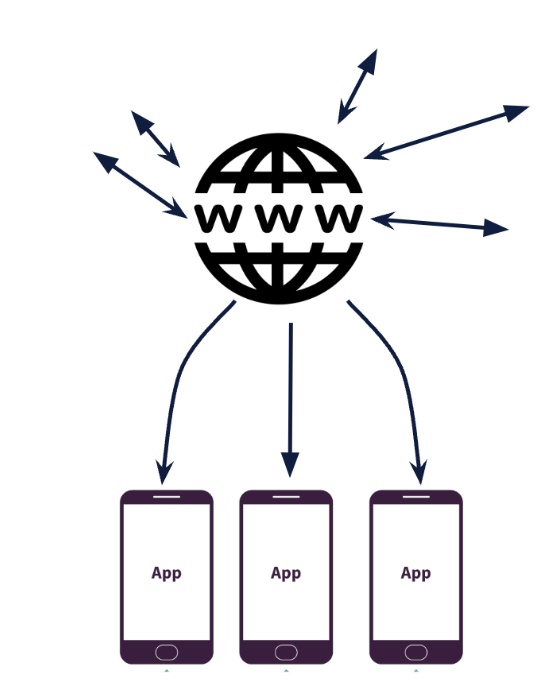
While cloud storage is usually internal information shared within your app, APIs allow your app to access external information from the internet.

Cloud Storage
www connected to 3 phones
API

Let’s say you are building an app to help people decide what to wear based on the weather. You could spend lots of time uploading data about the weather into a database, but there are many websites that show the weather. 

A better solution would be just to grab data from a weather website and show it to your users through your app, by using an API.

Here is a good video explainer of how APIs work.

To use an API, you have to: 

  1. Find a website that uses APIs. Here is a list of public APIs that are available, listed by topic.
  2. Read their documentation for how to use their APIs. Most sites give examples.
  3. Some sites require you register for an API key before using their APIs. Note, some APIs cost money to use. 
  4. Incorporate the API code into Thunkable. 

CODING EXAMPLES

Below are some tutorials to give you practice using Web API’s in Thunkable.

NOTE! In some of the tutorials listed here, the Web API component is shown in the Designer window. However, in the current version of Thunkable, you will find the Web API component in the Blocks Editor, under Advanced.

Click on the + to add a Web API component. You can add the URL and query parameters in the properties window that appears, or in code. Coding the blocks should be the same.

component window Thunkable showing Web API
This video gives an overview of APIs and the Thunkable Web API component.

Here is a very basic example of using the Google Maps API to start the Google Maps app from your own app, targeting a specific location.

This example tutorial uses an API from OpenWeatherMap.

Thunkable as an entire playlist of different Web API examples.

ACTIVITY: FRUIT NUTRITION APP

Estimated time: 30 minutes

Display Fruit Information using API

  1. Open the starter project in Thunkable.
  2. Run the app to see how it works.
  3. Make a copy of the project so you can edit it.
  4. Check the example JSON string below to understand what it looks like.
  5. Right now, the app displays only Calorie information. Add a second label below CalorieLabel to display one of the other nutritional values returned.
Open Starter Project

Best practices: Fun Fact, what does json stand for? “JavaScript Object Notation”. Json was created in 1999 and almost every single piece of data that we use or get every day needs to use json in some way. If we didn’t have json, almost every bit of tech we have would be useless. Almost all data from the cloud needs json to pass data.

Guiding Questions to ask students:

Can you create an API between you and your friends? 

If one of your friends says “/hello” you are going to respond with a greeting. That’s essentially an API. One person requests something (the hello) and then you respond back with the greeting of your choice. Could there be more complicated examples? /hug, /triviaQuestion, /story, /weekendSummary

Mentor tips are provided by support from AmeriCorps.

stylized A, AmeriCorps logo in navy

Here is an example JSON string returned by FruityVice for banana.

{ "genus": "Musa", 
"name": "Banana",
"id": 1,
"family": "Musaceae",
"order": "Zingiberales",
"nutritions":
{ "carbohydrates": 22,
"protein": 1,
"fat": 0.2,
"calories": 96,
"sugar": 17.2
}
}

Hopefully you successfully added a second nutritional label with API information!

If you would like to see a possible solution, click this button. 

REFLECTION

Using APIs in your app can be a very powerful tool, but it is not easy to implement!

You must spend time reading the API documention for the site to understand how to get the information you need.

interconnected network
Do you think this is a useful component for your app?
Can you find an online website that provides the information you need?
Previous slide
Next slide

REVIEW OF KEY TERMS

  • Application Programming Interface (API) –  a way you can get information from another website or database to use in your app

ADDITIONAL RESOURCES