Code 7
Debugging Your App
Learning Objectives:
In this unit, you will learn…
- Tips for debugging your code
Debugging Tips
You have taken your ideas and translated them into code. But you are encountering bugs. Agh!
We are so reliant on software that we can’t even imagine life without it anymore. In many ways, software has made our lives easier: we write emails, chat with friends on Facebook, play games and search for information on Google. Software is just about everywhere so we don’t even know we’re using it, for example in cars, traffic lights, TVs, washing machines, and hearing aids. We’re so used to having software that we expect it to function all the time!
So why doesn’t it? Why do we get bugs in the first place? As it turns out, writing software is not always easy. Software isn’t a physical product, so we can’t just look at it to see if it’s correct.
Debugging is the name for the process that coders use to figure out why their code isn’t working. When you did the Code Challenges, you may have already ran into something that forced you to go back over your code and figure out where you made a mistake. This is the essence of debugging and this next section will provide you with tips on how to make debugging easier for you.
Sometimes you may already know how to code something but it will still take you a very long time to do it! Great coders still make mistakes, even when they know exactly what they are doing, so it’s important to build a toolbox of debugging techniques that can help you out when you aren’t sure what went wrong. Everyone has a different method for debugging their code and you’ll figure out what yours is after you practice a bit. Debugging can often be the most time-consuming part of coding, so it’s really important to leave plenty of time for it!
Check out this video to learn about some of the errors that you may encounter in your code and how App Inventor helps you spot them!
If you have questions that are specific to App Inventor while you are debugging, there is an App Inventor Forum you can join here, and then post your question. Although the larger App Inventor community is usually quite helpful and responsive to questions, try searching the forum first to see whether your question has already been asked and answered. This will save you time.
Using test data
If you have a lot of really complicated data to use in your app it can be helpful to use test data. Test data is a simpler set of data that you’ll only use to test your app and make sure it is working correctly.
As an example, let’s say you are making an app that shows the user where the closest restaurant is to them. You want to use fusion tables to store the names of restaurants, the location data, and phone numbers. To get started building your app, you don’t need to have an entire list of restaurants ready in your fusion tables to start coding your app. You can just put in one or two test restaurants and get your app working before adding the real data.
“It's hard enough to find an error in your code when you're looking for it; it's even harder when you've assumed your code is error-free. ”
–Steve McConnell, software engineering expert and author
Using the Notifer
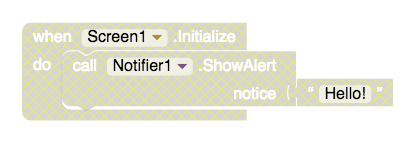
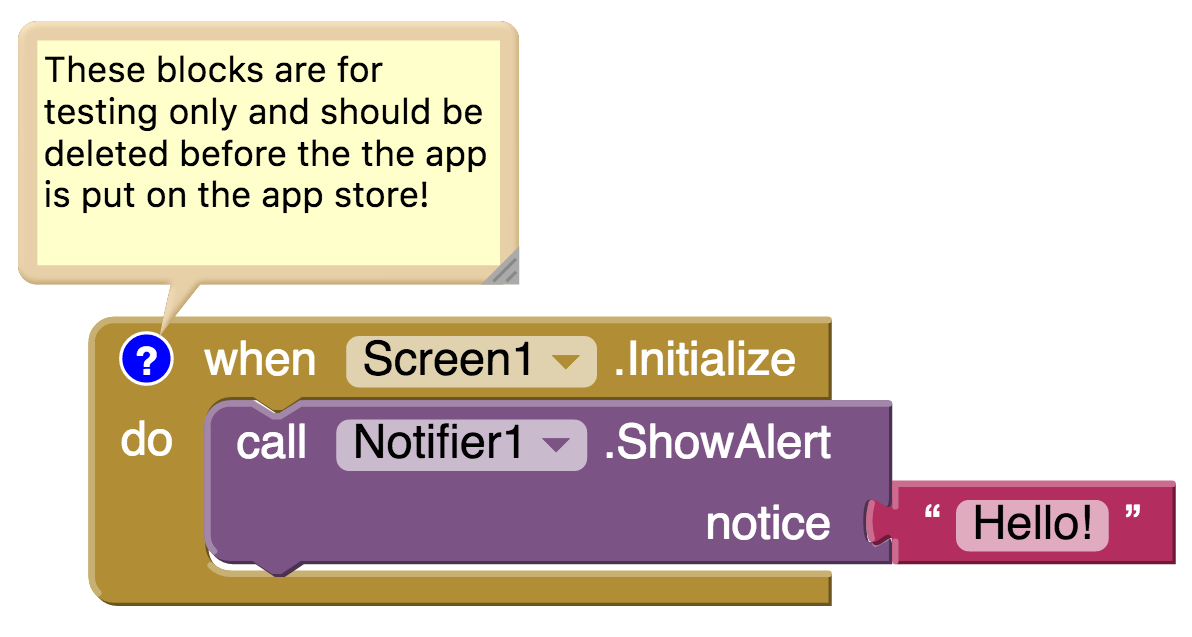
Let’s say your app is getting stuck and you’re not sure why! You can use the notifier to pinpoint where your code is broken. To put a notifier in your app drag it over from the user interface palette. It will appear as a non-visible component like this:
You can then use these alerts to tell you where your app is getting stuck. For example, let’s say you were using an if statement in your app to carry out a procedure. When you select Option 1 from the spinner you expect Procedure1 to happen. However when you test our your app nothing is happening! Your code looks like this:
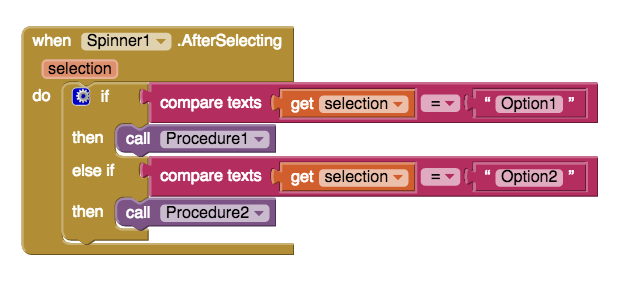
You aren’t sure if the problem is with Procedure1, or if it is with the conditional statement you set up. Your problem could also be with the elements that are in the spinner! There’s a lot of things to check so using the notifier can help you narrow down your options and figure out where your mistake is. You add an alert to each part of your conditional statement like this:
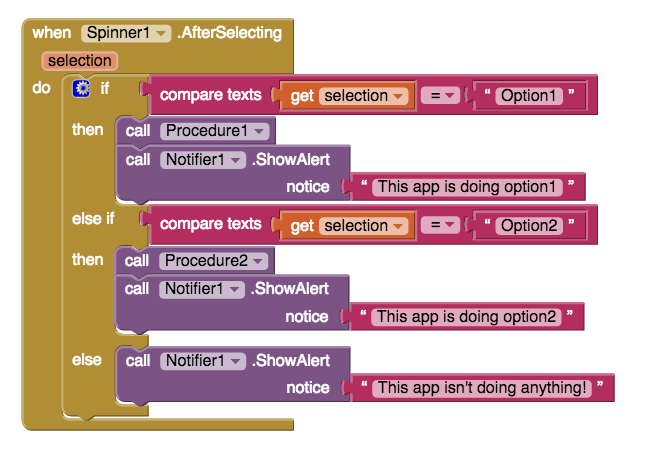
When you test your app now you get an alert that says “This app isn’t doing anything!” Now you know that the problem is with your conditional statement, not with Procedure1. The conditional statement is carrying out the code in the else section instead of the if section. Now you can check your conditional statement and see if there are any typing mistakes or if there is a mistake with the elements in your spinner.
If you had tested the app and gotten an alert saying “This app is doing option1” then you would know that the conditional statement is working correctly and that there is an error with Procedure1 not doing what it is supposed to. You could then check the code in Procedure1. Here’s some other scenarios when this method of testing may be helpful:
- To resolve problems with a loop getting stuck
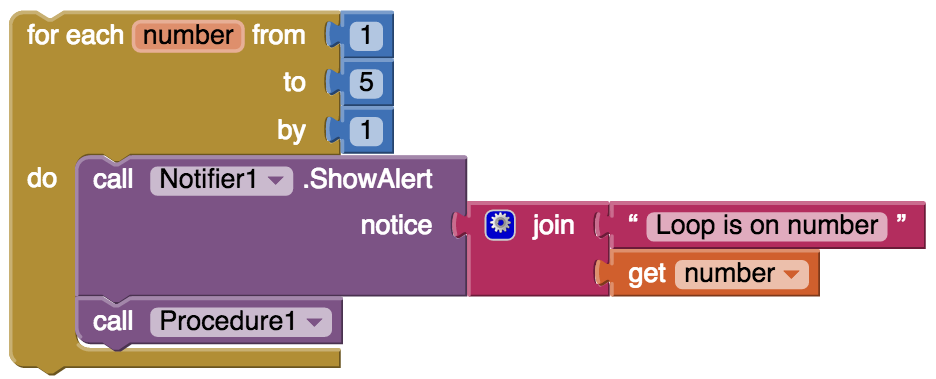
- To test if a screen is loading or getting stuck

Collapsing and Disabling Blocks
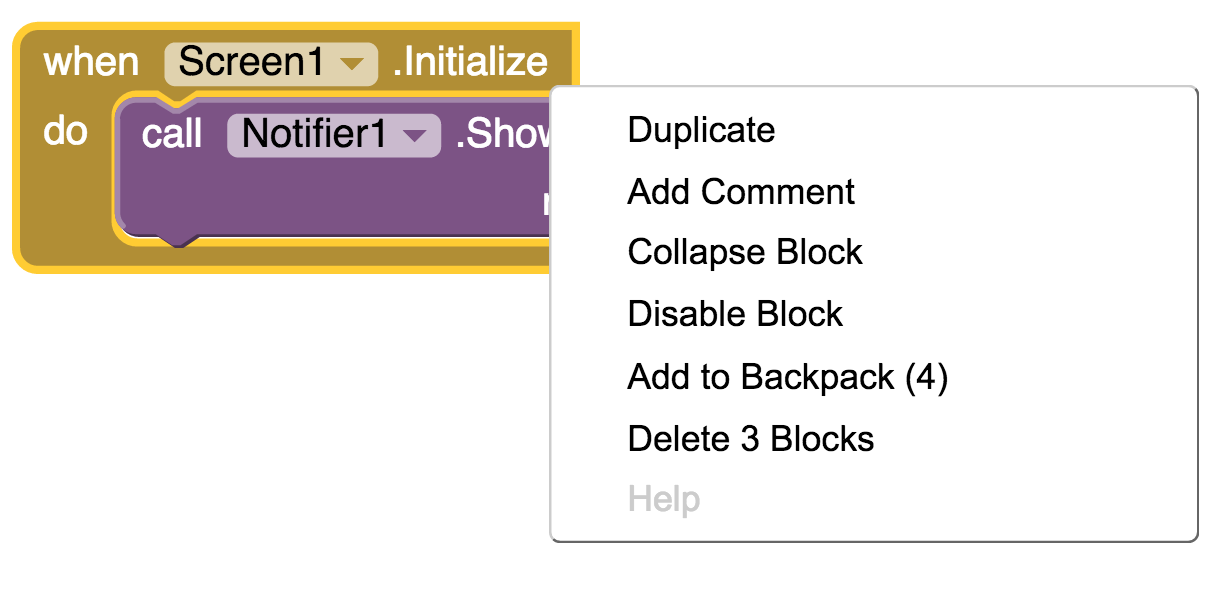
Two things that may help you are disabling and collapsing blocks you are not using. If you right click on the a block App Inventor will give you the option to collapse or disable a block:
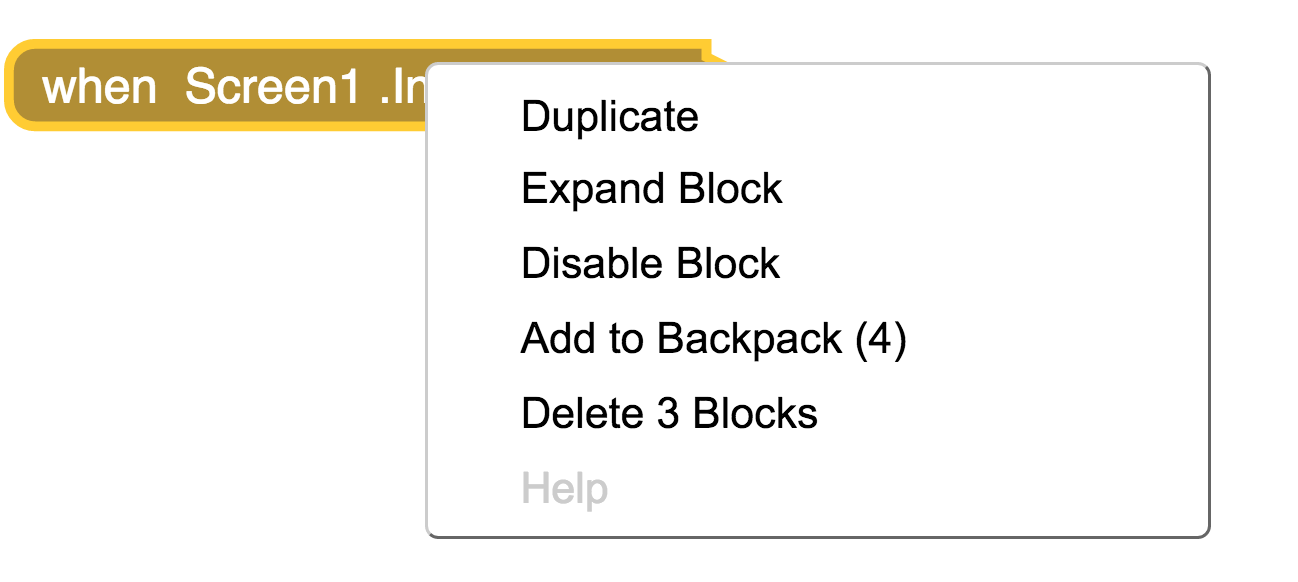
Collapsing the block will compress it down to one bar on your screen like this:![]()
This can be helpful when you have a lot of code on your screen and don’t need to see certain parts of it that you are not working on. To expand your block again you need to right click on them.
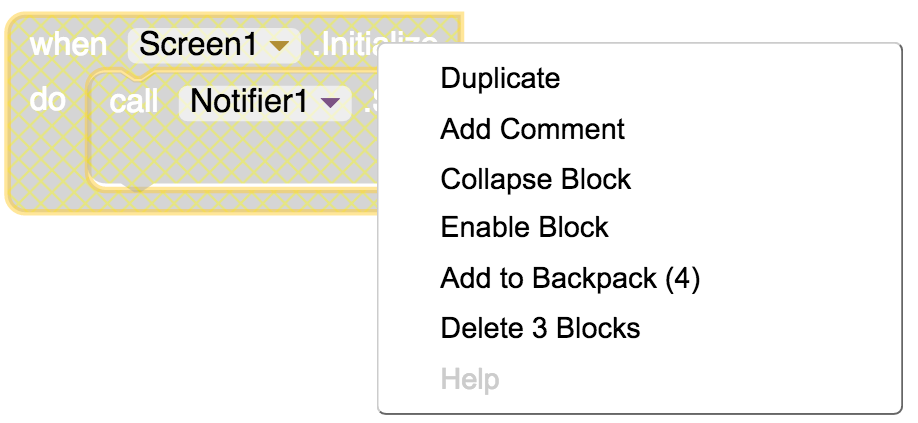
You can also disable blocks. This will keep them on your screen but prevent them from doing anything. This can be very useful if you have a chunk of code that is not working and you want to test your app without it. You can also do this if you have a notifier block that you were only using for testing purposes but you don’t want to delete it yet. Disabled blocks look like this:
To enable your blocks again, right click on them and click “Enable Block”.
“By learning to create technology, girls learn to speak up."
–Regina Agyare, Founder of Soronko Solutions
Version Control
Let’s say you have one part your app built and working. When you build and test a second part of your app, everything has stopped working including the part the used to work! You try to delete the blocks you just added but your whole app still isn’t working! Now you aren't sure what went wrong and wish you had an "undo" button.
To avoid scenarios like this it can be helpful to create different versions of your app. These different versions will save your code exactly as it is so that if you make a mistake later on and don’t know how to fix it, you can go back to the last working version you saved. You can also use version control if you are experimenting with features for your app and you’re not sure if you want to keep them. There are two ways to save different versions in App Inventor, using “save as” and “checkpoint”.
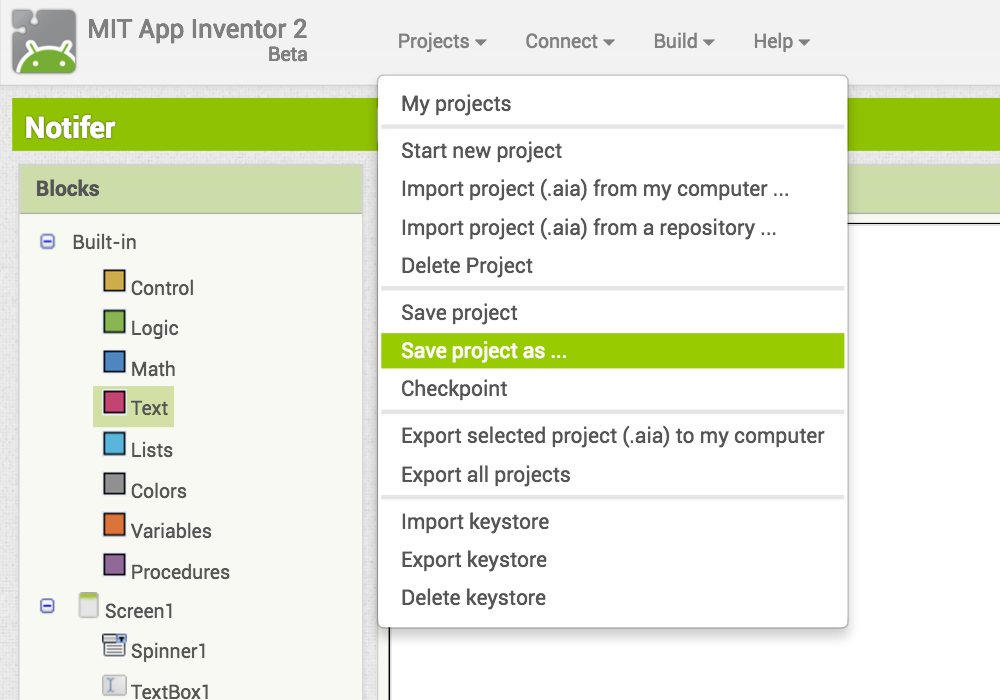
The “save project as” option allows you to create a copy of the code you are working and save it under a new name.
For example let’s say the project you are working on is called “test”. You can save the project you are working on as “test_version2” and keep adding code to it. If you mess something up you can go back to your project called “test”.
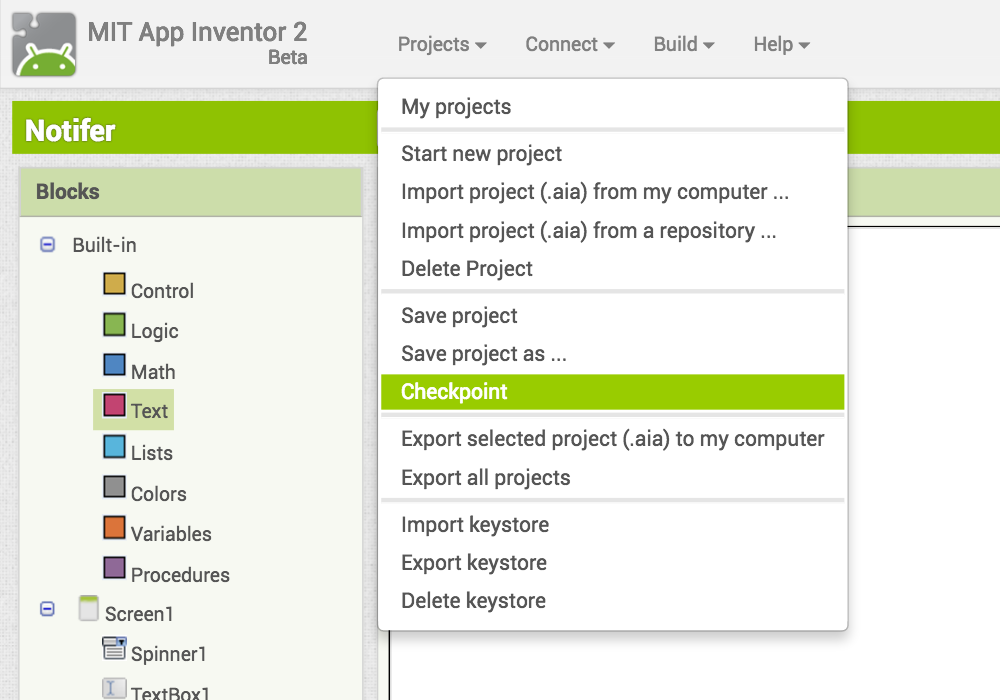
The “checkpoint” option lets you save your code as it is under a new name.
For example let’s say the project you are working on is called “test”. Checkpoint will save your current code as a project called “test_checkpoint1”. Then you can keep working and if you mess something up you can go back to the project called “test_checkpoint1”.
Watch this video to learn more about version saving in App Inventor.
Reflect
Congratulations! You are almost done building an app that is ready to submit to Technovation. We are excited that you have made it this far, and know it has been very hard work for your team.
If this is the first time you have created an app or used code, you've undoubtedly learned a lot and overcome frustration. Some teams even overcame language barriers and limitations to resources that made getting started very difficult.
We are proud of you, and hope you are just as proud for yourself. You have persevered, worked hard, and learned from each other. You are an inspiration to us, and many more.
Additional Resources
- MIT Testing Documentation
- Here's another video that may help with debugging: Debugging Video
Comments
Good programmers often leave comments in their code to explain what it does. Comments can be helpful when other people are looking at your code, such as teammates, mentors, and judges. Comments can also help if you return to your code later and have forgotten what parts of it do. To add a comment in App Inventor, right click on the blocks and select “add comment”:
After that a blue question mark will appear in the corner of block and you can add text. You can view the comment by clicking on the question mark.